.webp)
.webp)
Tutorial
1
Choose Your Activity Mode
The Find Objects generator offers two game modes that create fundamentally different worksheet products. Your first decision is which mode to use for the current project.
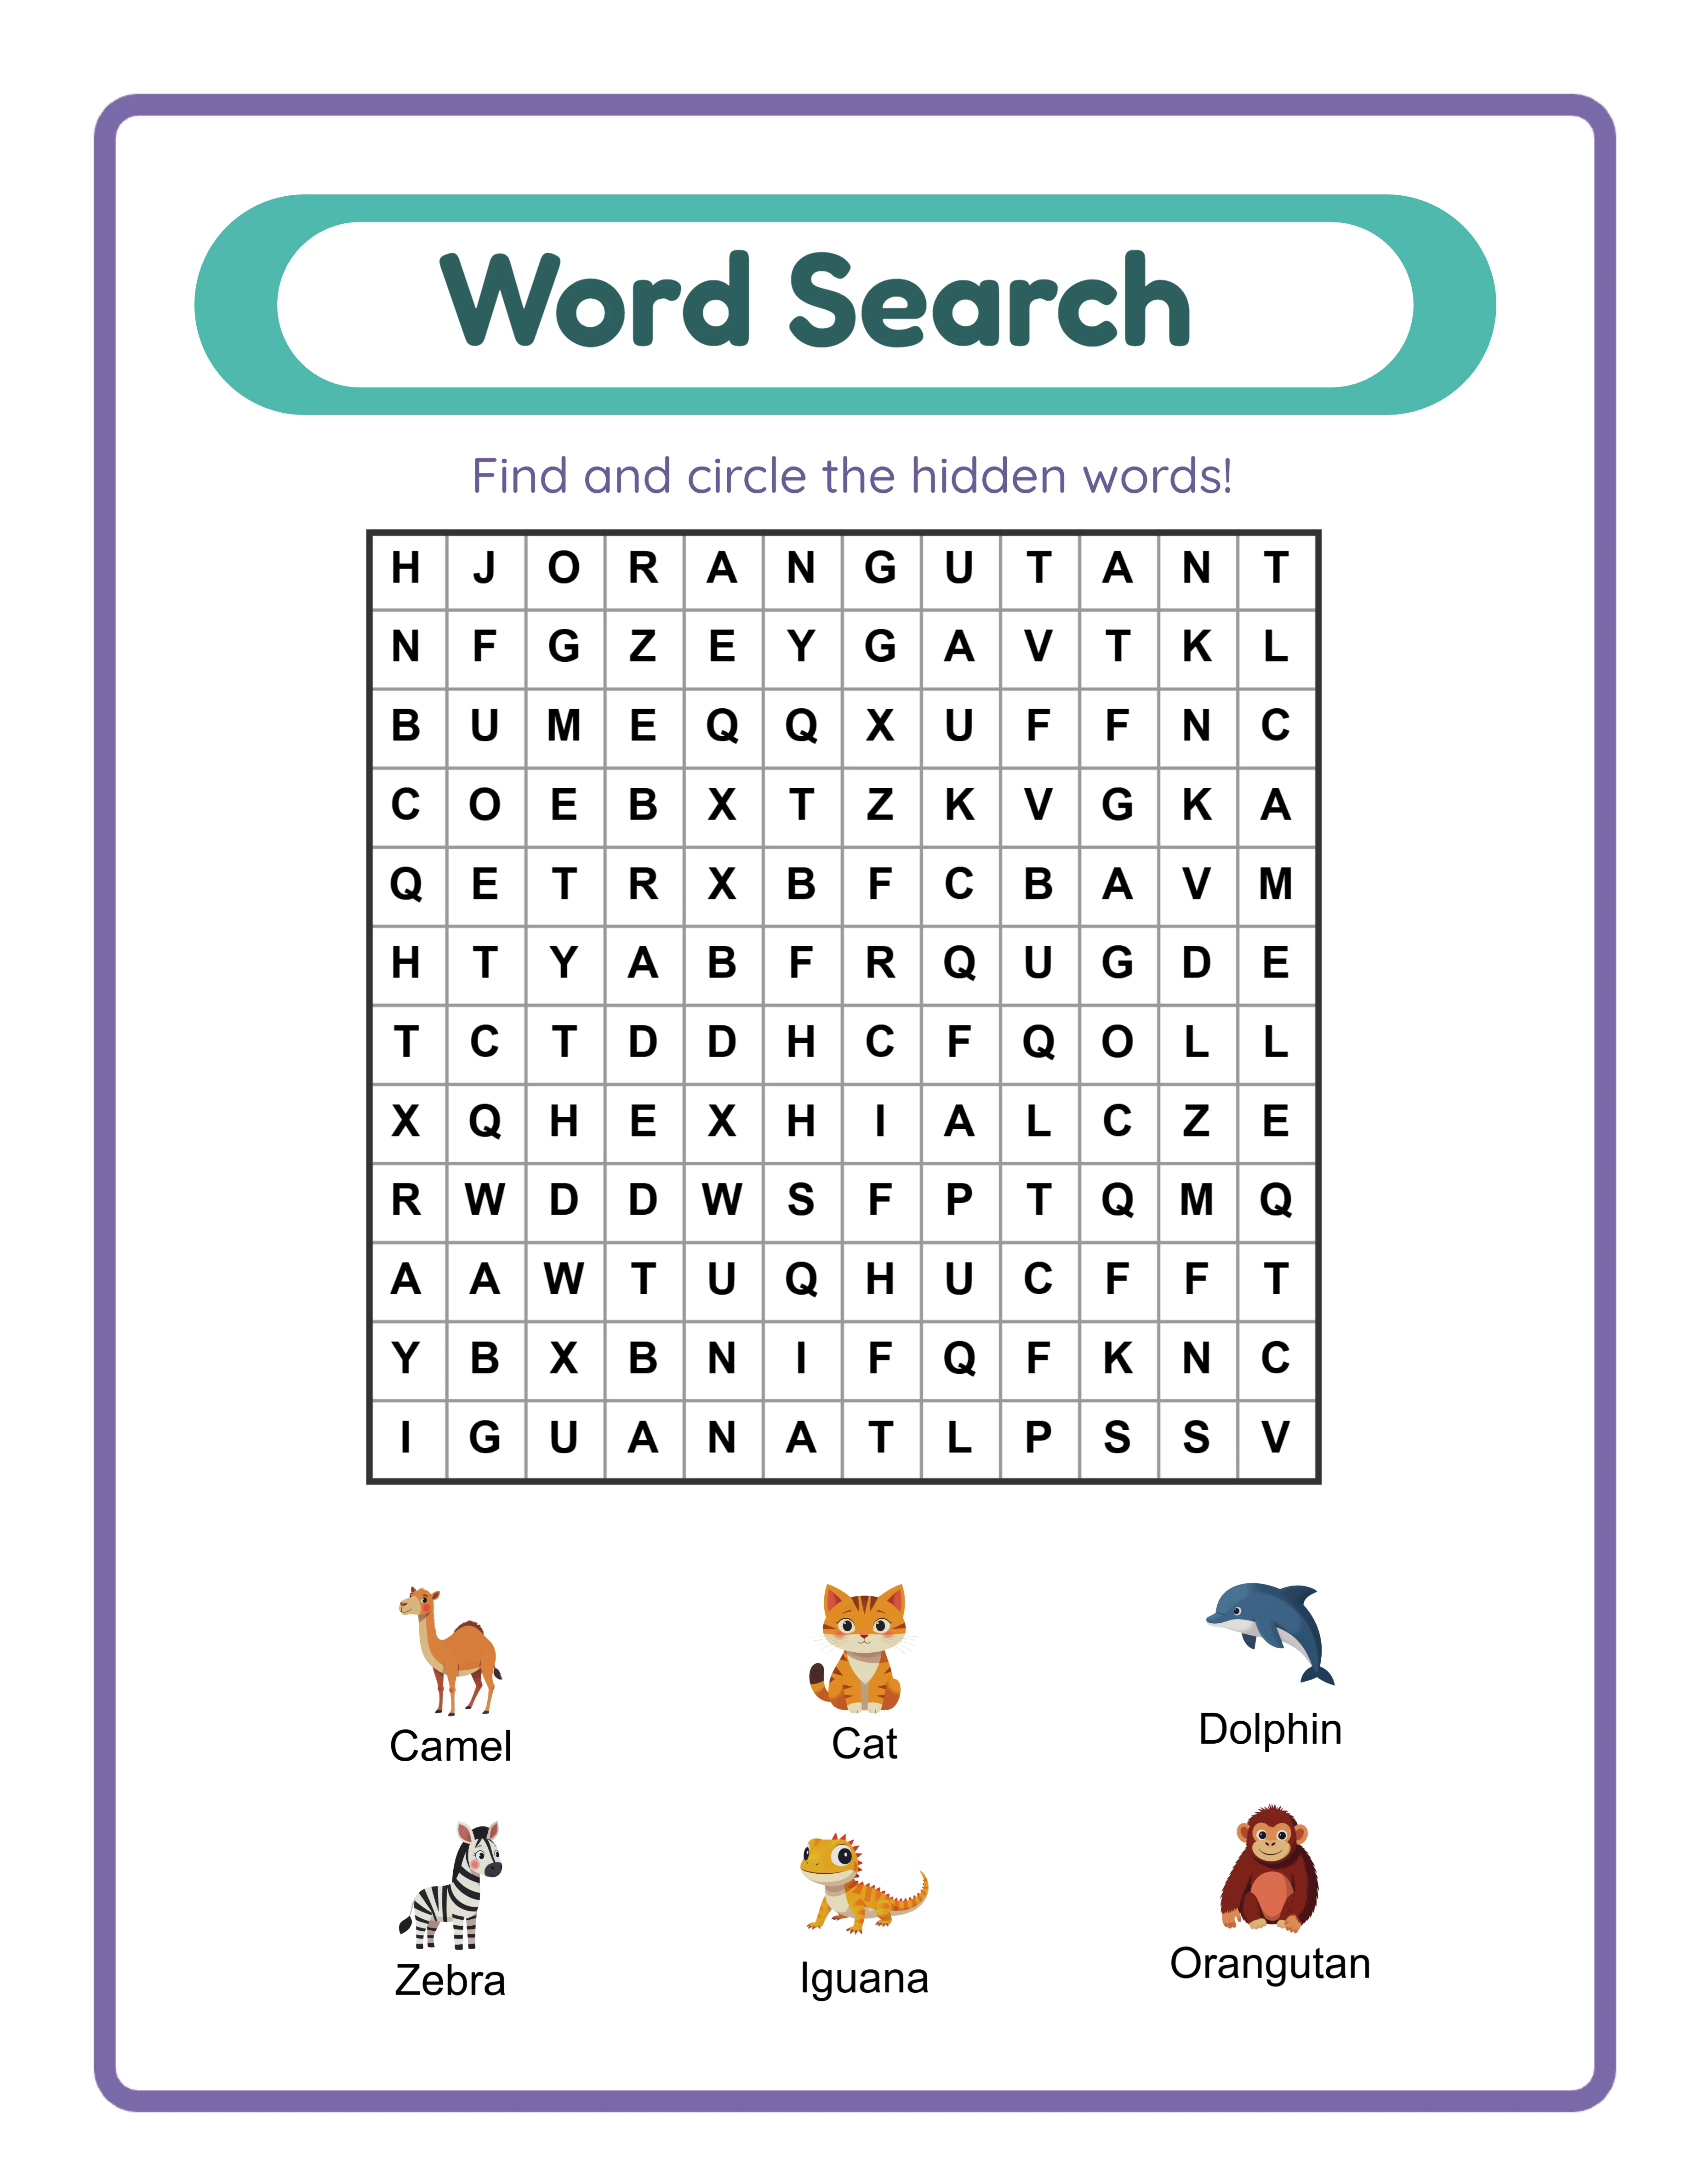
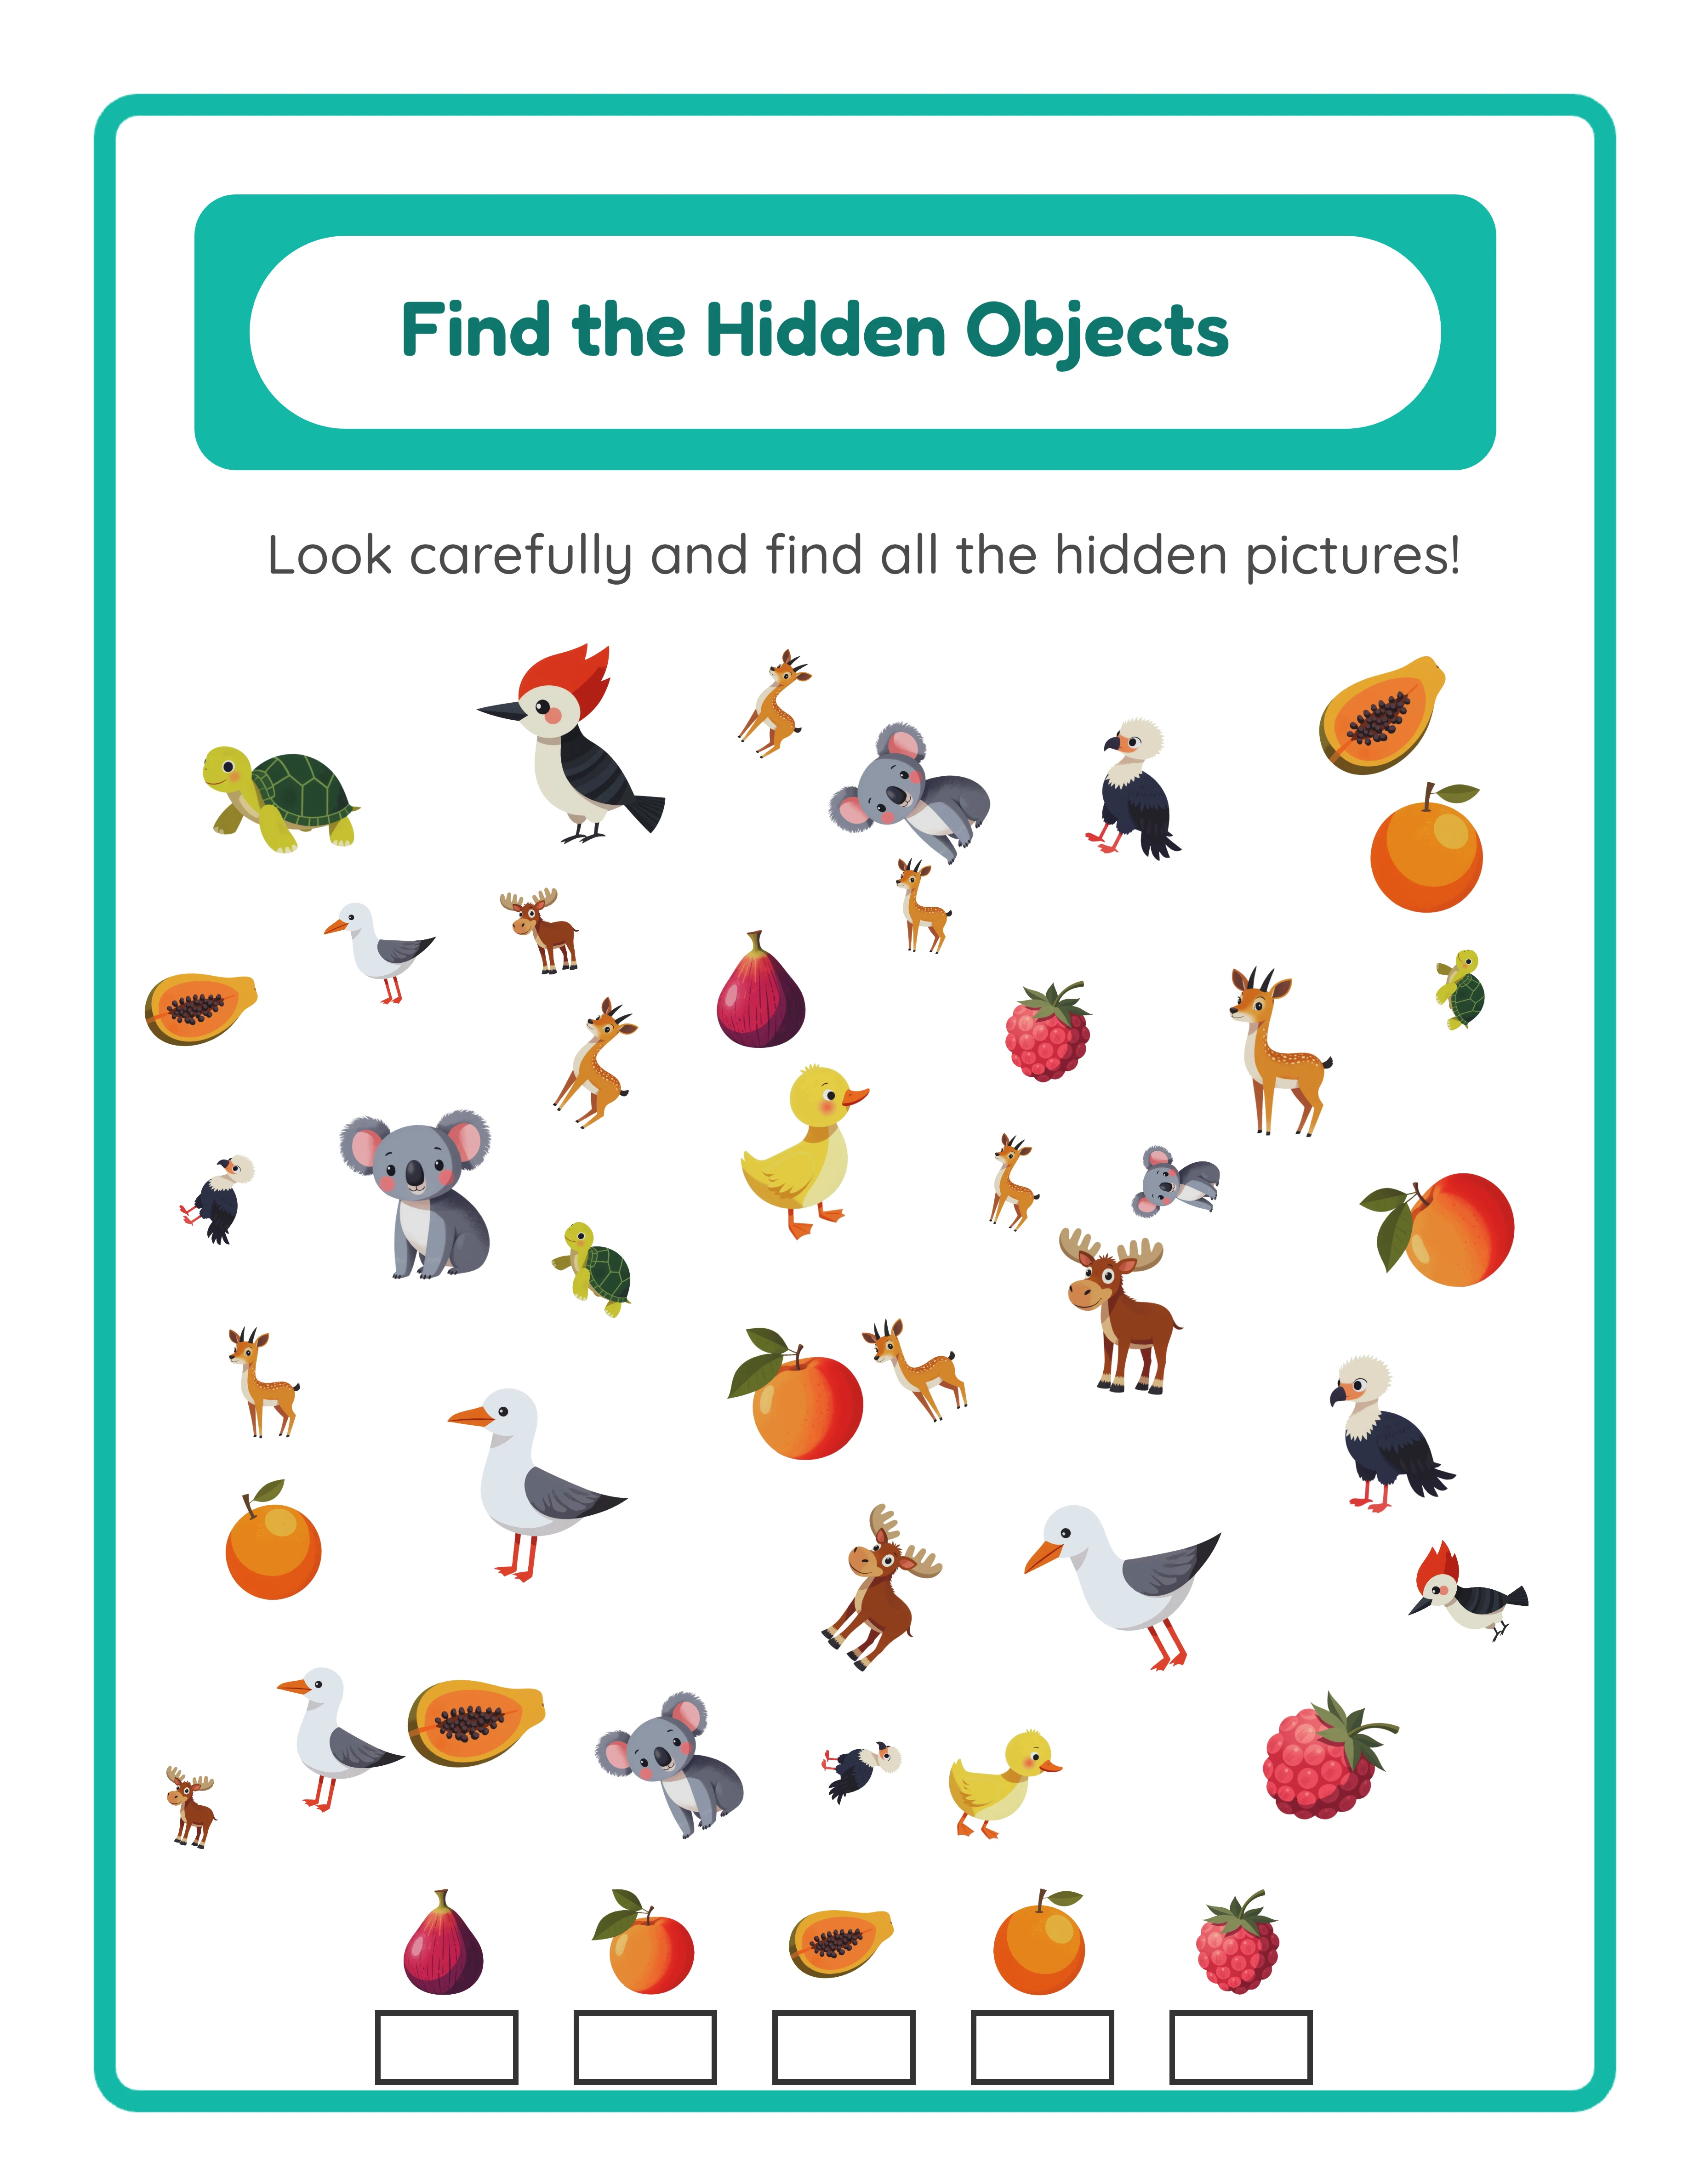
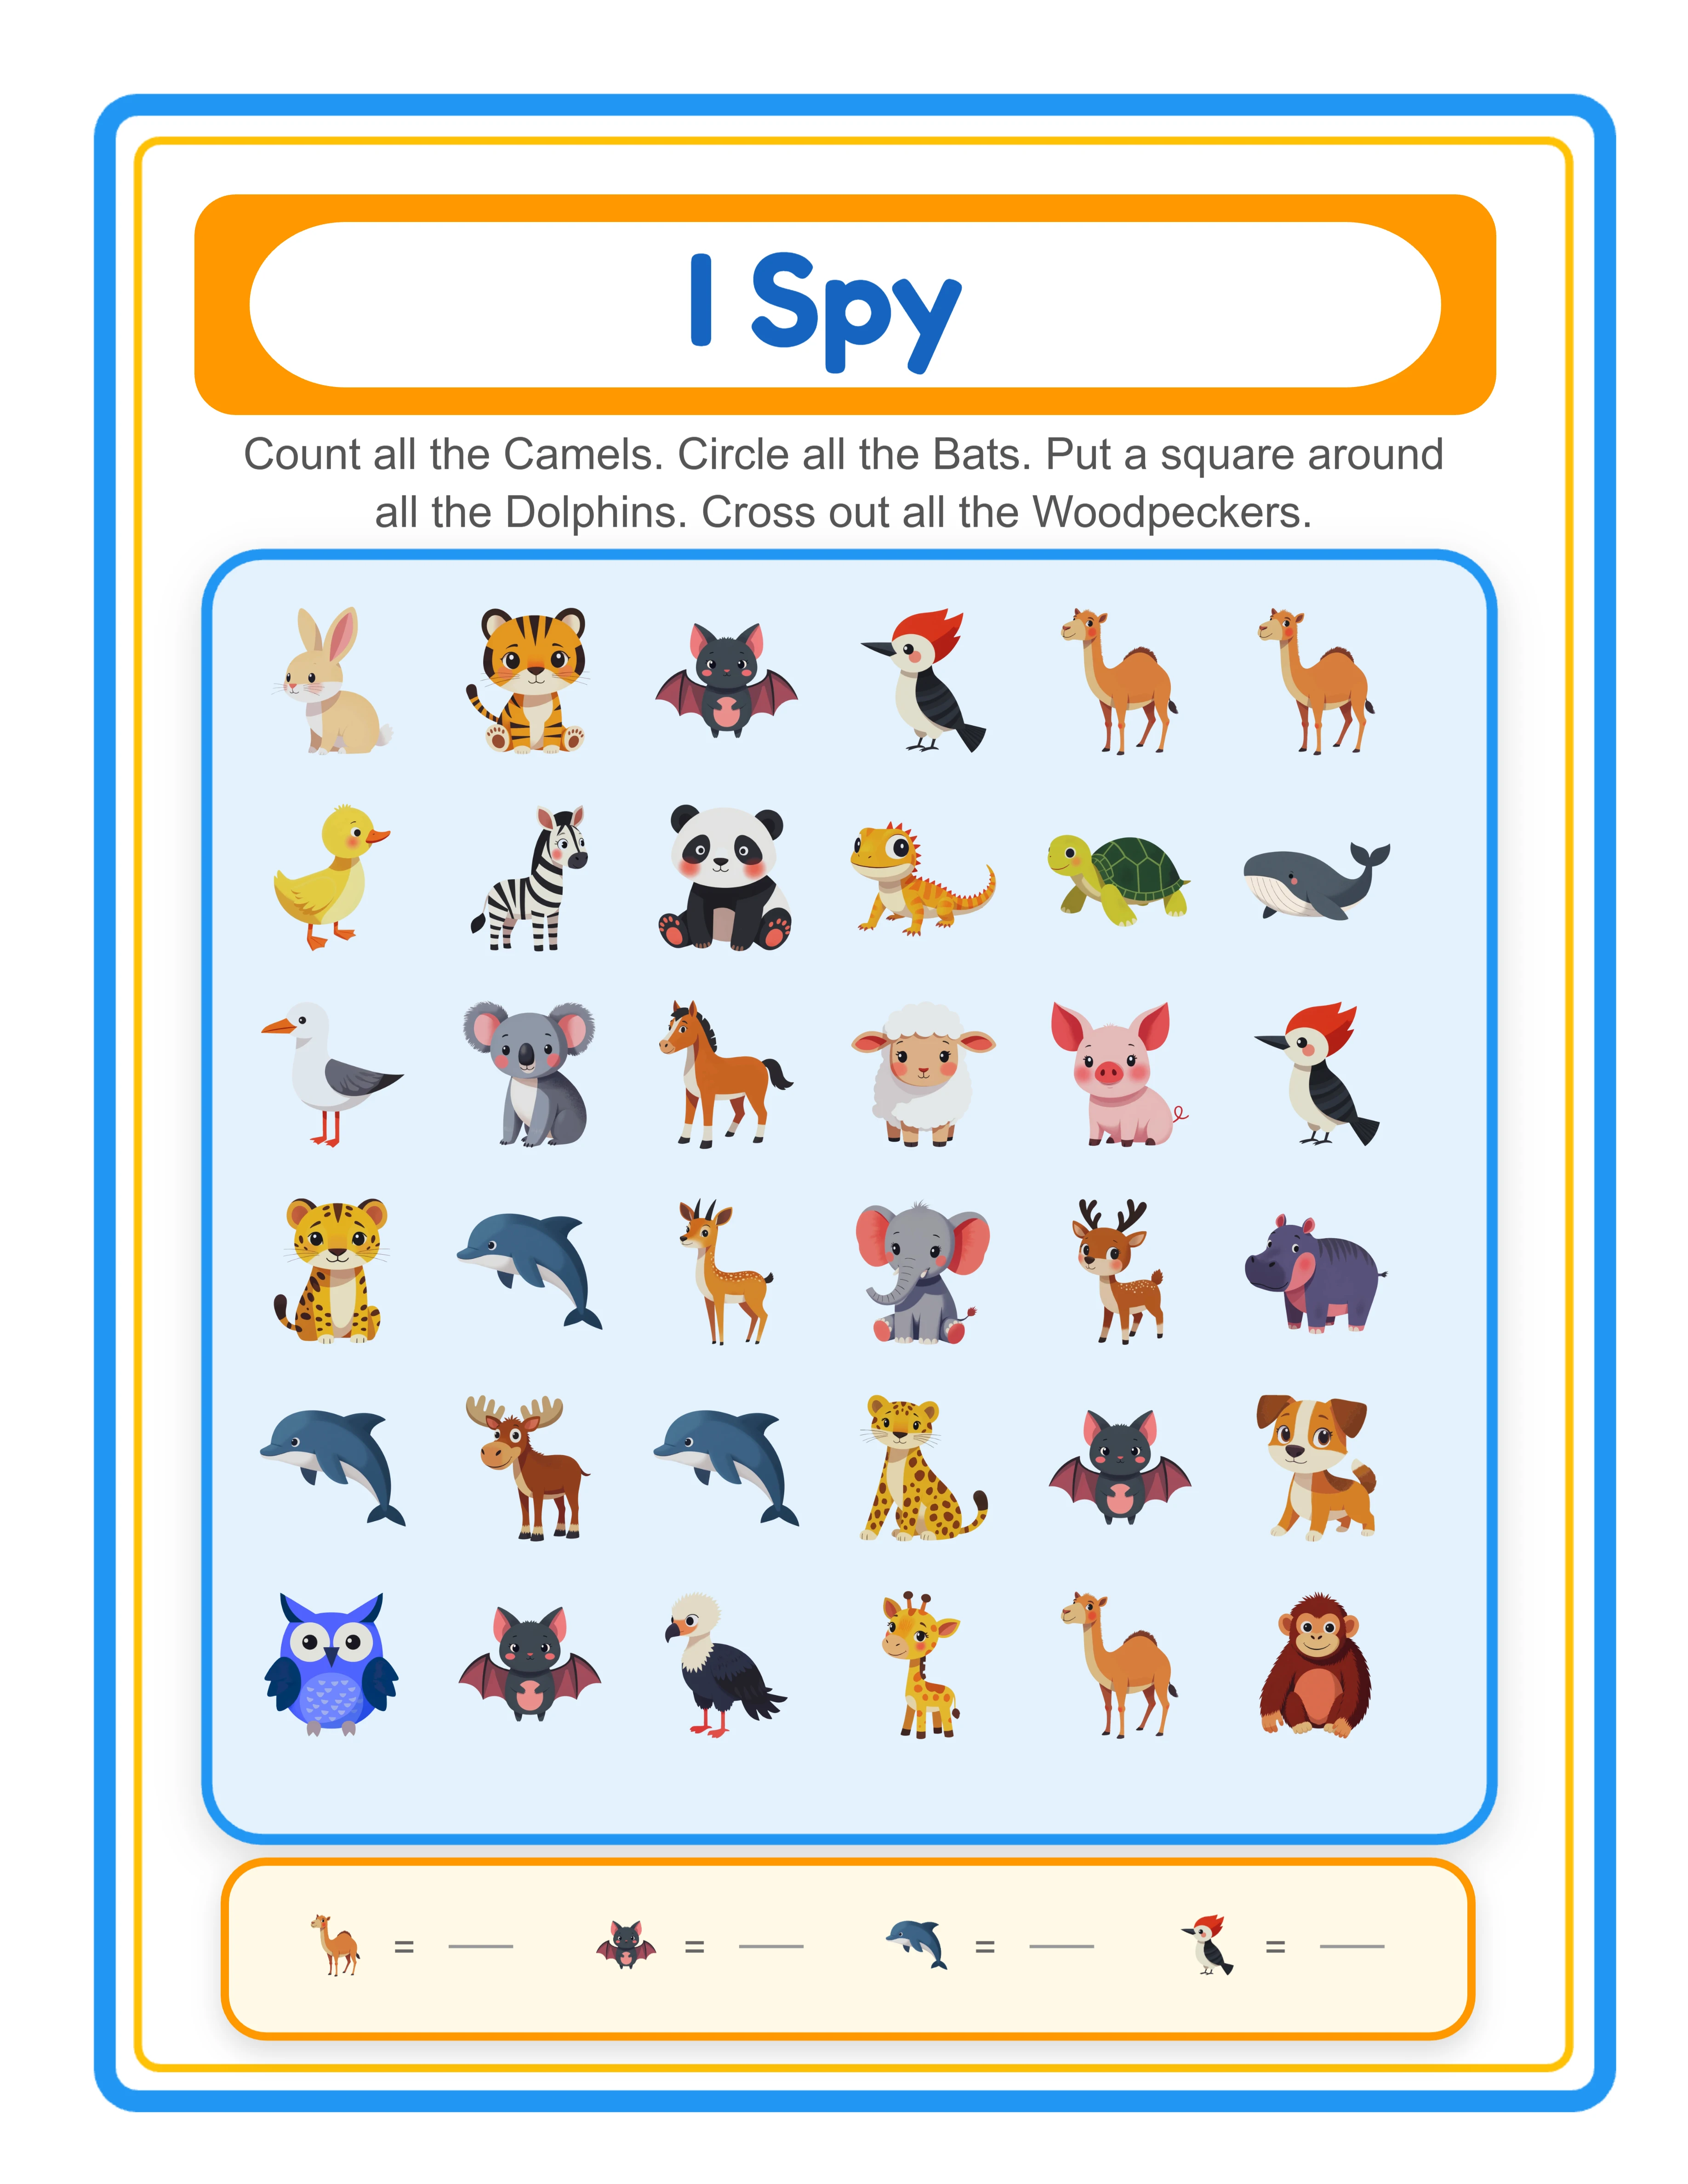
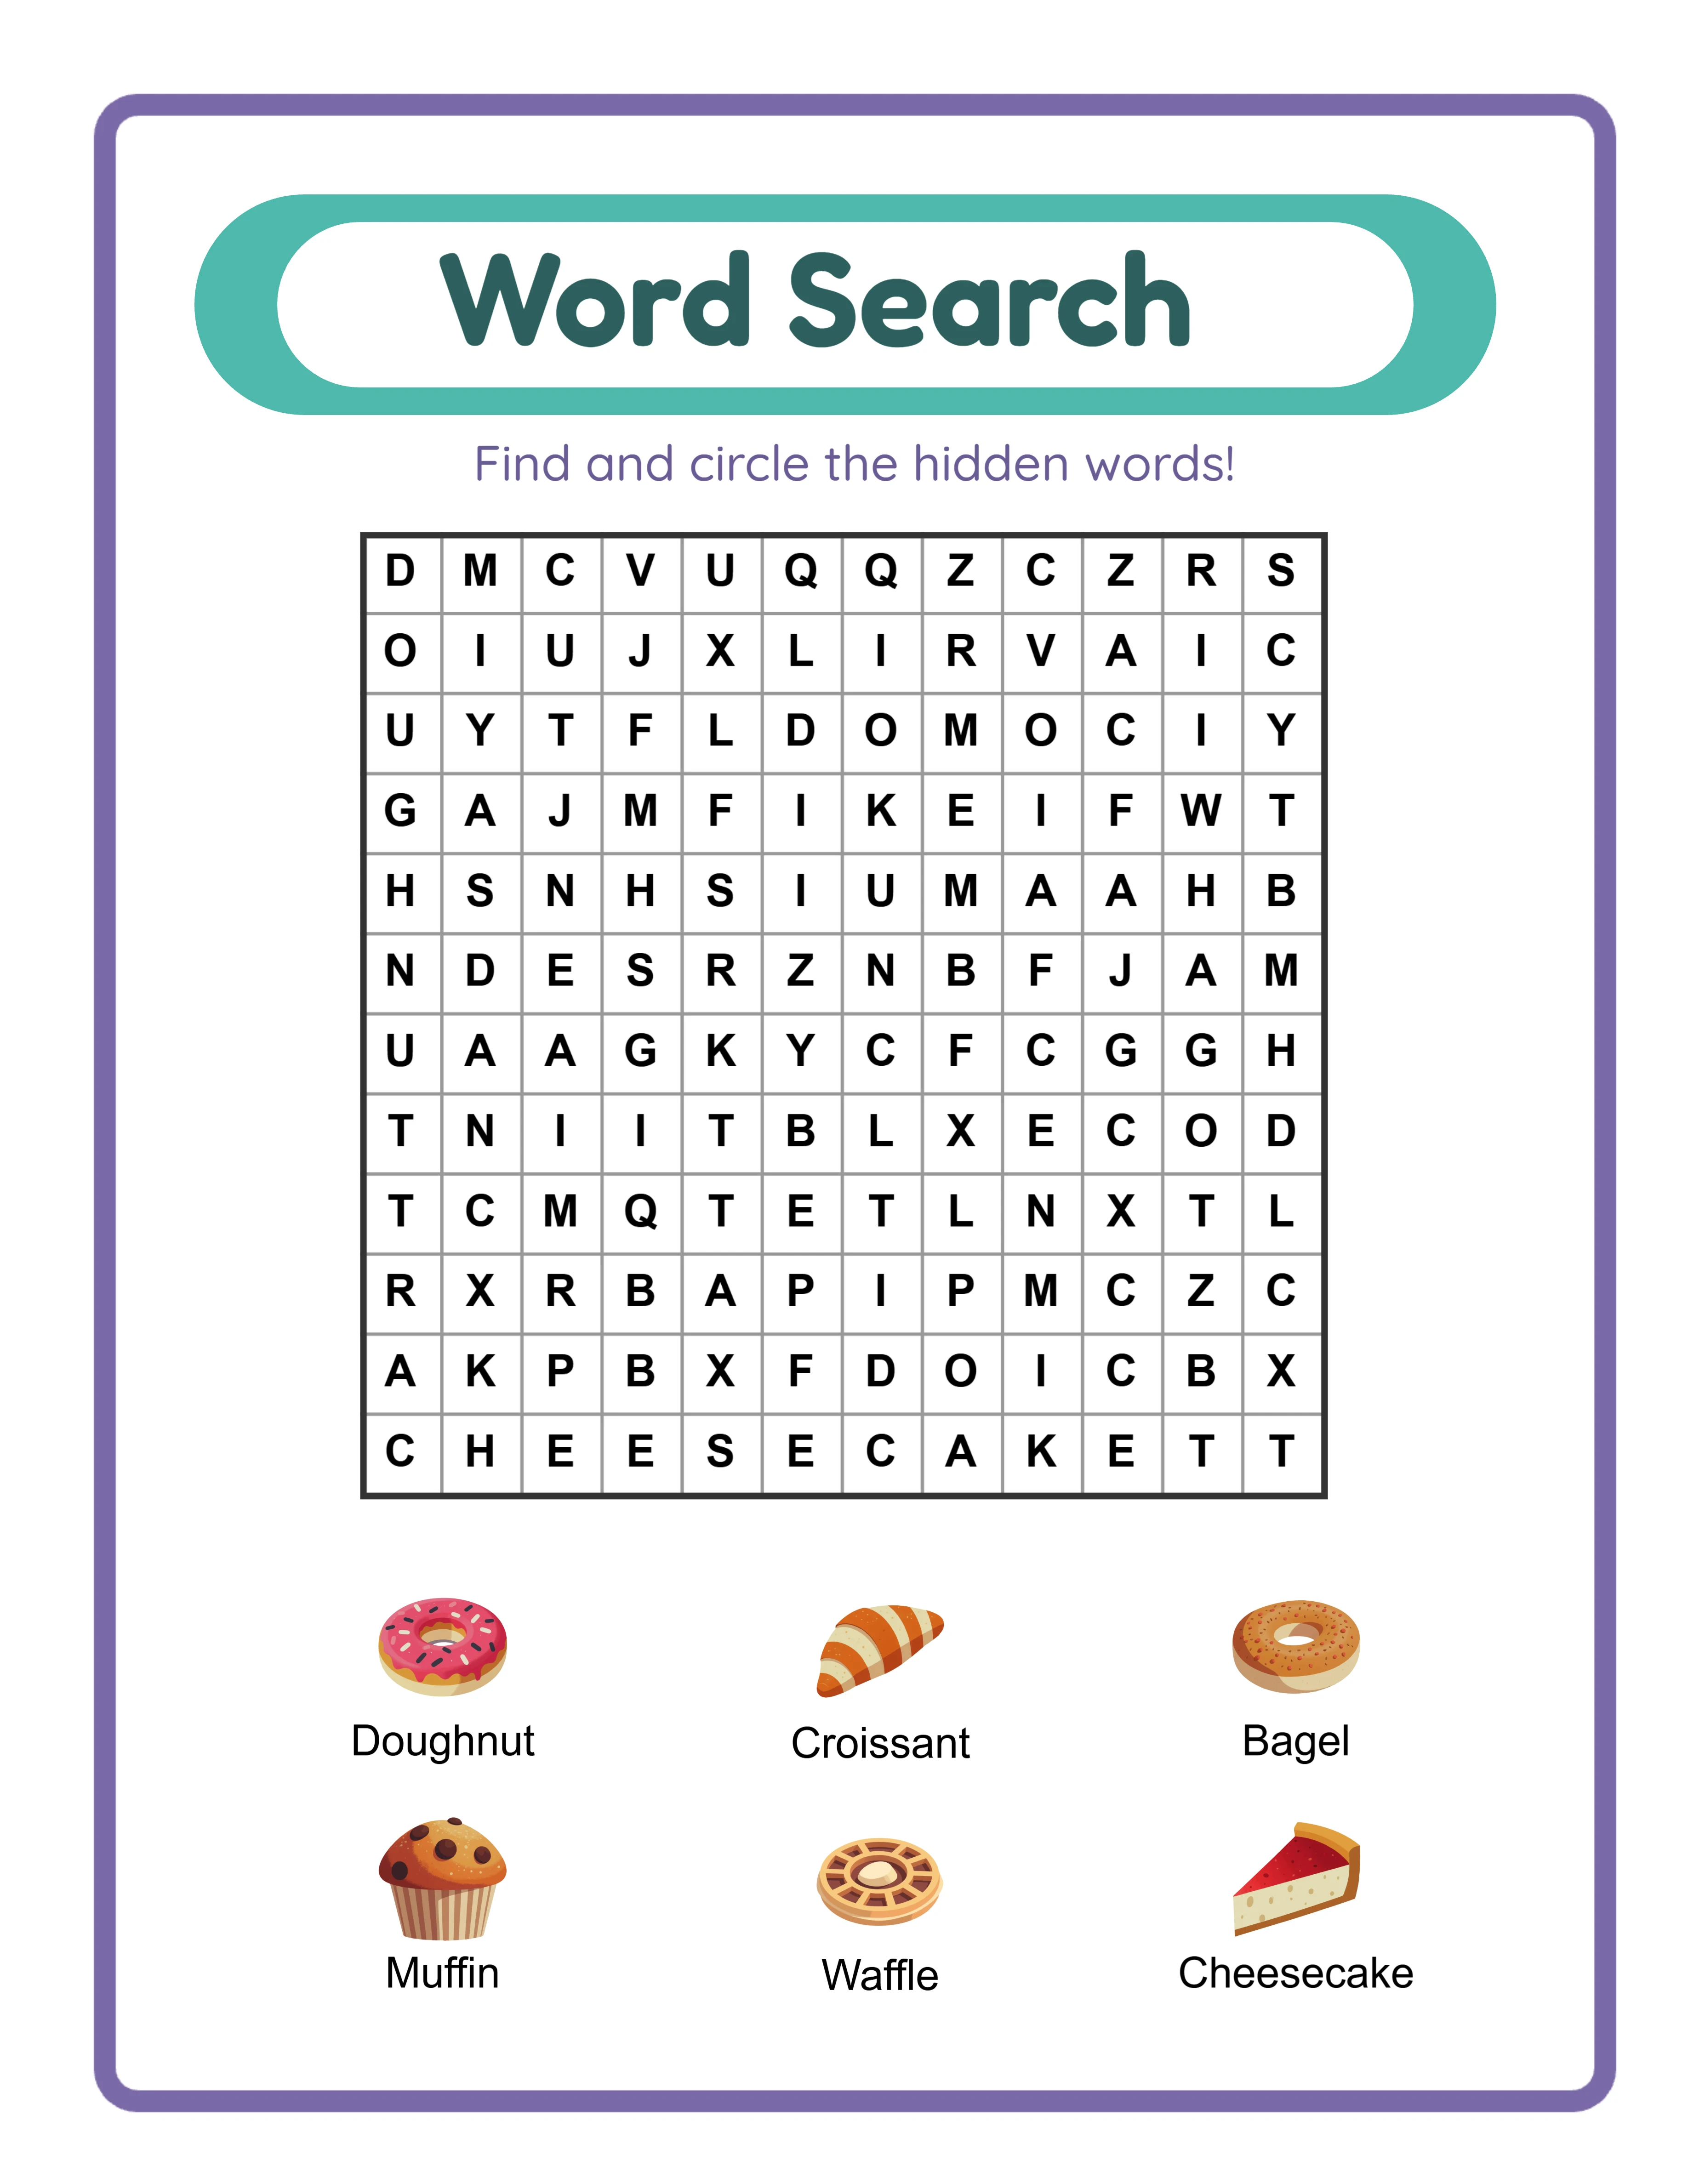
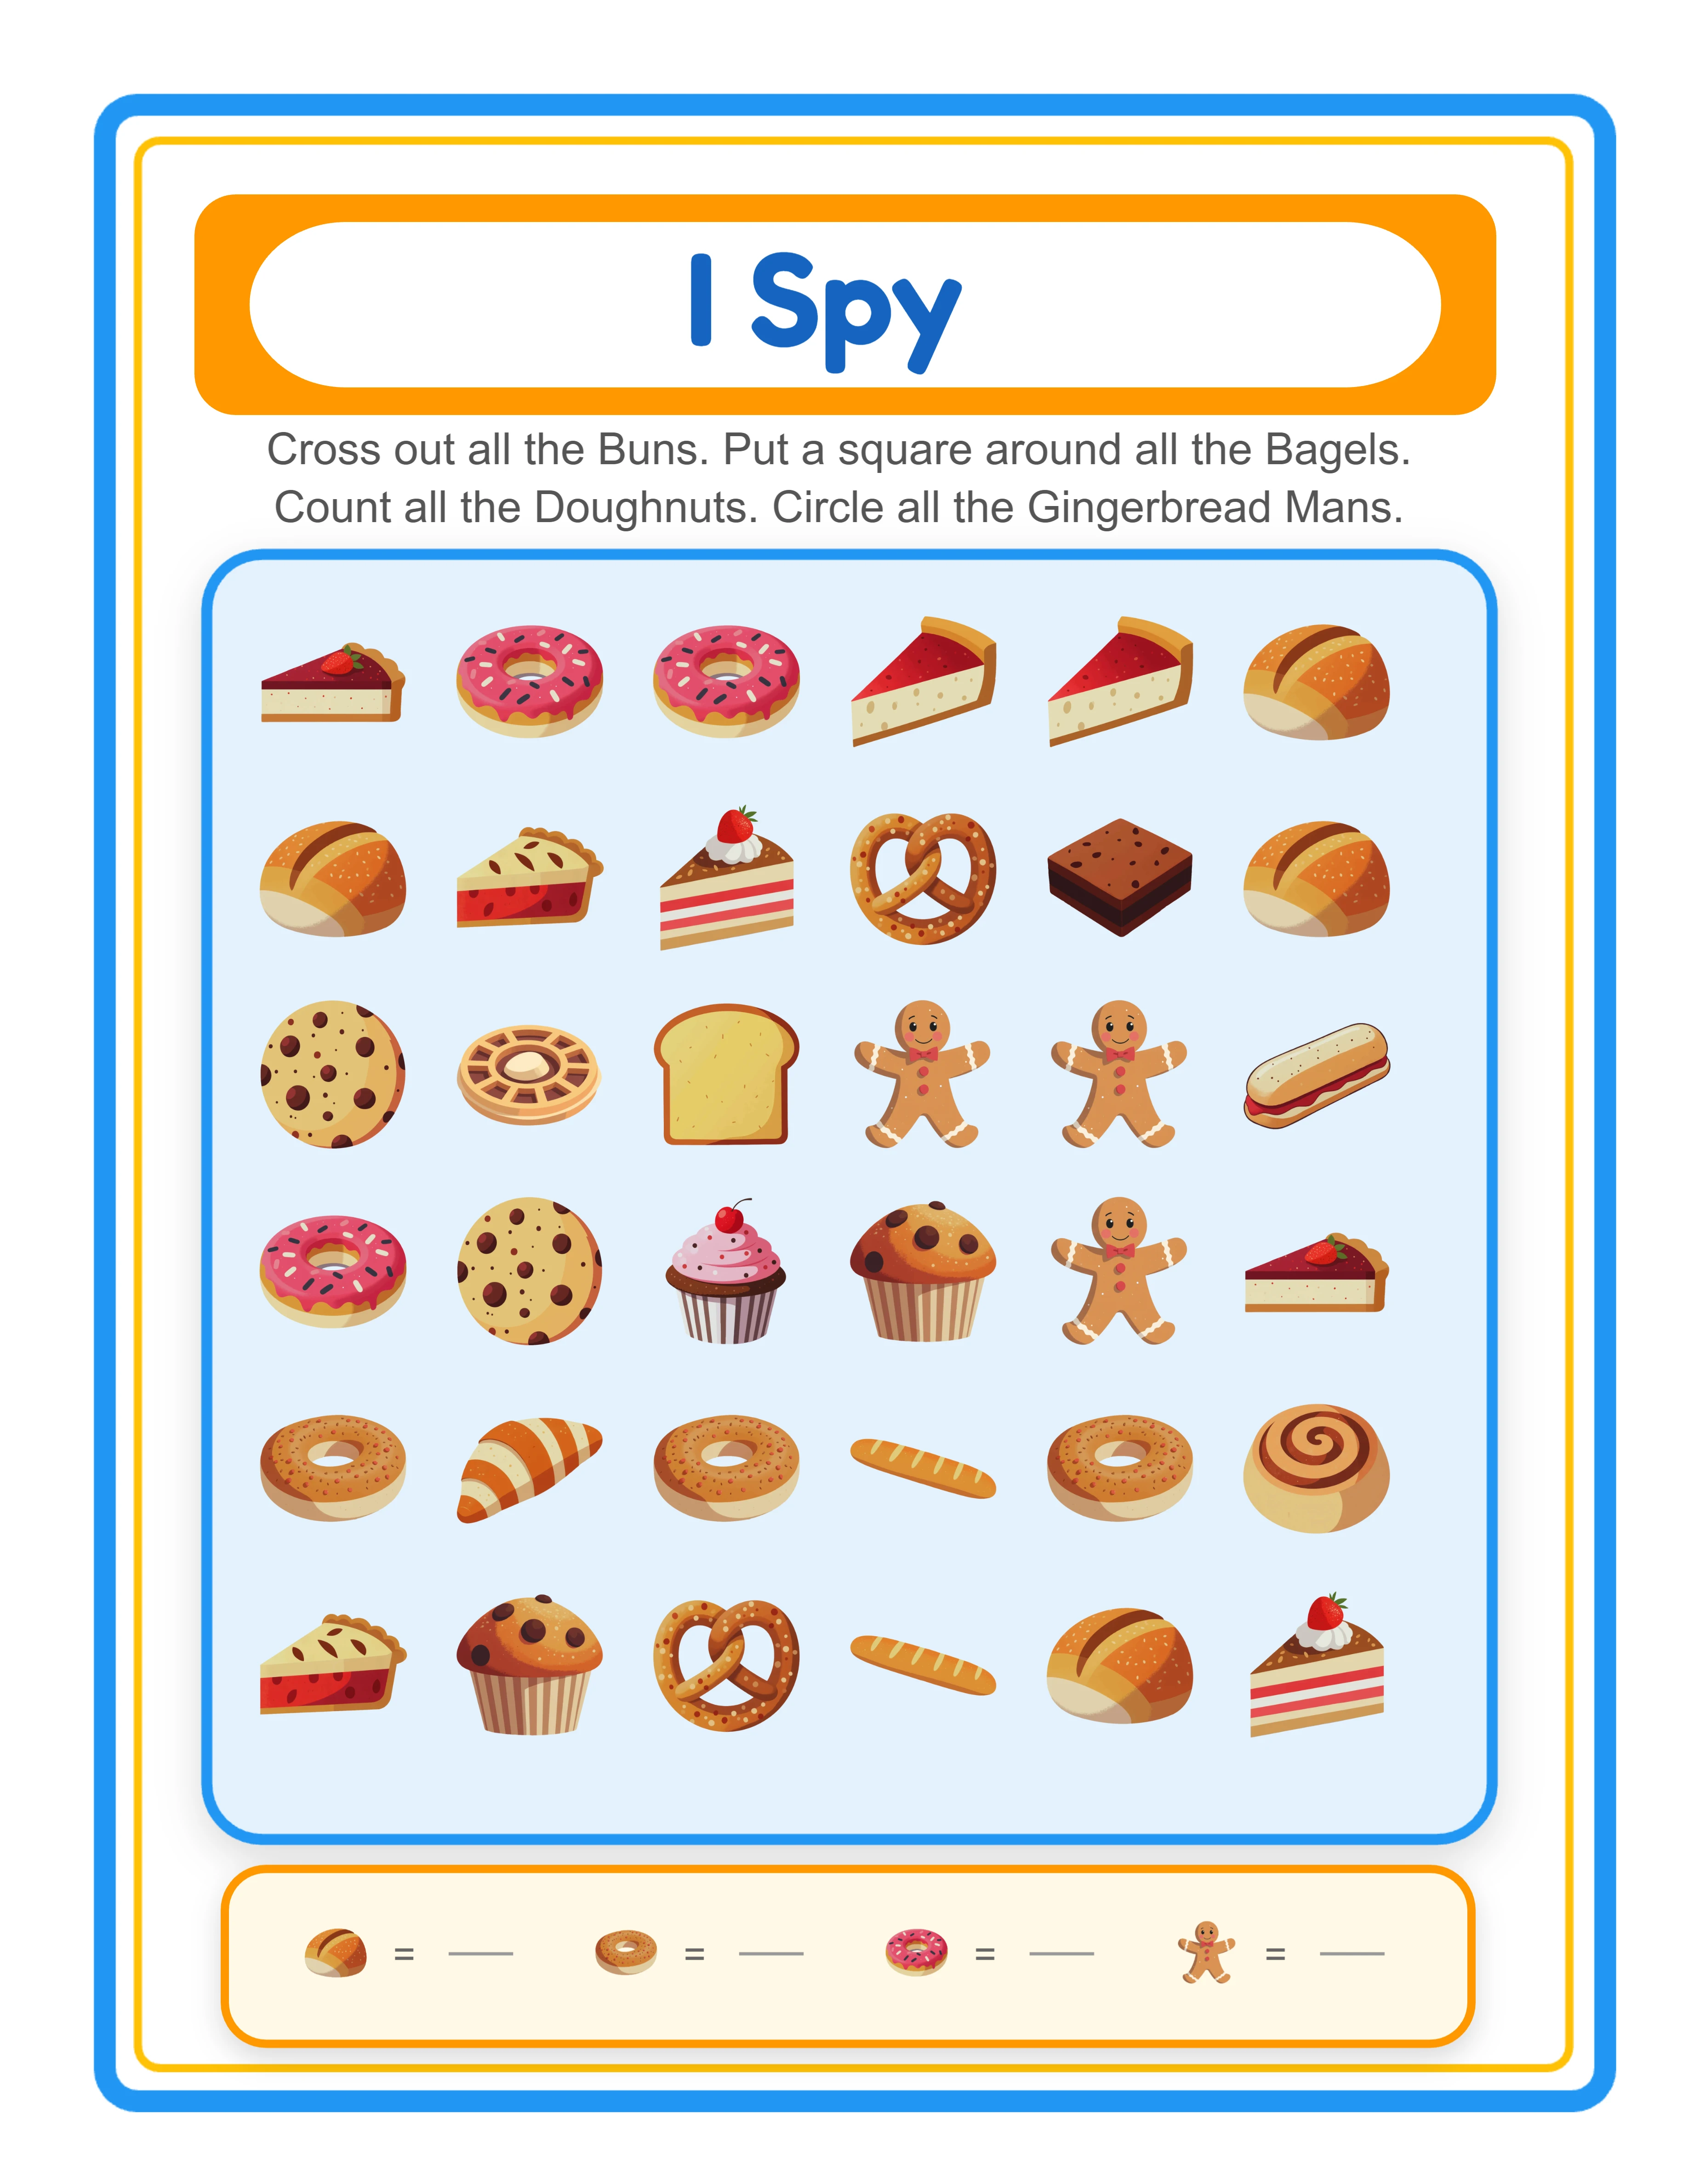
I Spy mode is the classic hidden object format. You select 8–12 distractor images that form the background scene, then choose 1–5 hidden objects that children must find within that scene. The distractor images create visual noise, and the hidden objects are placed among them at various sizes and positions. Children examine the scene, locate each hidden object, and mark or circle it. This mode develops visual scanning, sustained attention, and figure-ground discrimination.
Odd One Out mode takes a different approach. You configure 8–12 pairs of matching images (creating 16–24 total items on the page) and then add 1–3 unpaired images — the odd ones out. Children scan the scene to find which images do not have a matching partner. This mode develops pattern recognition, visual comparison, and logical deduction.
Both modes produce answer keys automatically, and both export in the same formats. The difference is the cognitive skill they target and the product category they fit into on marketplaces. I Spy worksheets compete in the "hidden object" and "seek and find" search categories. Odd One Out worksheets compete in the "odd one out" and "spot the difference" categories. Creating products in both modes doubles your marketplace coverage from the same tool.
2
Select a Theme and Build Your Scene
With your game mode selected, the next step is choosing the images that will populate your scene. The Find Objects generator provides access to a themed image library with over 100 categories covering animals, food, vehicles, nature, holidays, sports, occupations, and more.
Use the theme dropdown to filter the image library by category. Once you select a theme, the available images appear in the selection panel. For I Spy mode, you pick two groups of images: distractor images (8–12) that form the busy background scene, and hidden objects (1–5) that children must find. For Odd One Out mode, you select the paired images (8–12 pairs) and the unpaired odd items (1–3).
You can also use the keyword search to find specific images across all themes. This is useful when you want to mix images from different categories to create more interesting scenes — for example, combining animals and food items in a single farm scene.
Theme selection is a strategic product decision. Each theme creates a unique product you can list separately on marketplaces. A "Zoo Animals I Spy" worksheet and an "Ocean Creatures I Spy" worksheet target completely different search terms despite using the same generator. With 100+ themes available, you can build an extensive catalog without repeating yourself.
The language selector in the image library controls the display labels for images in the UI, but since hidden object worksheets are visual-only products, the selected language does not affect the final worksheet output. Your finished scenes work for any audience regardless of language.
3
Upload Custom Images (Optional)
The Find Objects generator supports custom image uploads, letting you create unique branded scenes that no other seller can replicate. This is a significant competitive advantage on crowded marketplaces where differentiation drives sales.
Click the upload area to select multiple image files from your computer. Uploaded images are stored in your browser session and appear alongside the library images in the selection panel. You can mix custom uploads with library images freely — use your own illustrations for the main objects and library images for background fillers, or vice versa.
Custom uploads are particularly valuable for three scenarios:
Branded product lines: If you create your own illustrations or clip art, upload them to build scenes with a consistent visual style that becomes your brand signature across all your listings.
Client work: If you create custom worksheets for schools or tutoring centers, upload their specific images (mascots, logos, curriculum-specific visuals) to create personalized products.
Niche themes: If the image library does not cover a specific niche you want to target (local landmarks, specialized occupations, cultural celebrations), upload your own images to fill that gap.
Uploaded images are session-based, meaning they persist while your browser tab is open but are not stored permanently on the server. Save your custom images locally so you can re-upload them for future sessions.
4
Configure Page Size and Background
Page configuration determines the physical dimensions and visual styling of your worksheet.
Page size options include US Letter Portrait, US Letter Landscape, A4 Portrait, A4 Landscape, and Custom dimensions. US Letter is standard for North American buyers. A4 is standard for European and international markets. Creating both versions doubles your international reach with minimal effort. Landscape orientation works well for scenes with wide panoramic compositions, while portrait orientation suits vertically layered scenes.
The background section provides several controls for visual polish:
clear decorations: This checkbox (enabled by default) adds subtle decorative elements around the border area of your worksheet. These decorations give the page a playful, professional look that appeals to parents and buyers browsing marketplace listings.
Background theme: Select a themed background pattern from the library. This fills the page behind your scene objects, adding visual texture and context to the scene.
Background opacity: Control how prominently the background pattern appears. Lower opacity (0.1–0.3) creates a subtle watermark effect. Higher opacity (0.5–0.8) makes the background a prominent part of the scene. For hidden object worksheets, moderate opacity often works best — visible enough to add atmosphere but not so strong that it makes objects harder to find.
Fallback color: A solid color that appears where no background theme is applied. White is the default and works well for most printed worksheets. Light pastels can add warmth to digital-use products.
Border theme and opacity: Select decorative borders that frame the entire page. These add a polished, finished look that distinguishes your products from plain worksheets.
5
Add Text and Instructions
Text tools let you add titles, instructions, and custom labels to your worksheet. Well-crafted text transforms a simple image scene into a structured educational activity.
The text input field accepts any custom text. Common examples for I Spy mode: "Find the hidden objects!" or "Can you spot all 5 animals?" For Odd One Out mode: "Which one doesn't belong?" or "Find the odd one out!" For branded products, add your business name or a fun worksheet title like "Safari Search Challenge."
Font selection offers seven families: Lexend Deca, Baloo 2, Nunito, Quicksand, Fredoka, Arial, and Verdana. Fredoka and Baloo 2 are playful and clear, ideal for preschool and kindergarten products. Lexend Deca and Nunito are clean and modern, suitable for products targeting older children or structured use. Arial and Verdana are universal fallbacks.
Font size starts at a minimum of 8 pixels and scales up for titles and headers. For worksheet titles, 24–36 pixels works well. For instructions, 14–18 pixels is readable without dominating the page.
Text outline adds a colored border around each letter, dramatically improving readability when text overlaps busy scene areas. Set an outline color that contrasts with both the text color and the background. Outline width ranges from 0 to 10, with 2–4 being the most practical range for most designs.
Text color uses a color picker for precise matching to your scene palette. White text with a dark outline, or dark text with a light outline, provides the strongest readability across varied backgrounds.
6
Generate and Arrange the Scene
With your images selected and page configured, click Create New Worksheet to generate the scene. The generator places your selected images onto the canvas according to your game mode settings.
This is where the Find Objects generator differs most from other worksheet tools. Instead of a fixed grid layout, you get a freeform canvas with professional editing tools for positioning every element:
Layers: Each image sits on its own layer. Use Bring to Front, Bring Forward, Send Backward, and Send to Back to control which images overlap and which appear on top. Strategic layering creates visual depth and makes scenes more challenging and visually interesting.
Alignment: Align selected objects to the left, center horizontally, right, top, center vertically, or bottom. Align to Page centers an object on the entire canvas. These tools ensure precise, professional placement that would take significant effort in general-purpose design software.
Lock and Unlock: Lock individual objects in place once you are satisfied with their position. This prevents accidental moves while you continue arranging other elements. Unlock All releases everything for repositioning.
For I Spy mode, arrange distractor images to create a dense, busy scene, then place hidden objects partially behind or between distractors. The goal is to make hidden objects findable but not immediately obvious. For Odd One Out mode, distribute all images evenly across the canvas so children can scan and compare pairs visually.
Use the zoom controls (zoom in, zoom out, percentage display, reset) to inspect details at close range and verify that objects are positioned correctly.
7
Review and Adjust Difficulty
Difficulty calibration is critical for hidden object worksheets. Too easy and children finish in seconds with no engagement. Too hard and they give up in frustration. The right difficulty depends on your target age group.
For preschool (ages 3–5): Use fewer distractor images (8–10), larger hidden objects, and minimal overlap. Hidden objects should be clearly visible with some searching but not instantly obvious. Use high-contrast themes where hidden objects stand out from distractors in color or shape.
For kindergarten (ages 5–6): Increase distractors to 10–12 and use moderate overlap. Hidden objects can be partially obscured by other images. Introduce some visual similarity between hidden objects and distractors to require closer inspection.
For early elementary (ages 6–8): Use the full range of 12 distractors with significant overlap and layering. Hidden objects can be smaller relative to distractors. Use themes where images share similar colors and shapes to increase the visual challenge.
Zoom in to inspect each hidden object's visibility. Can you find it within a few seconds of focused looking? If it takes you more than 10 seconds, it may be too difficult for younger children. If you spot it instantly without searching, it may be too easy.
Iterate by repositioning objects, adjusting sizes, and modifying layering until the difficulty feels right. The canvas tools make this process quick — unlock an object, drag it to a new position, lock it again, and reassess.
For Odd One Out mode, verify that paired images are clearly identifiable as matches and that odd items are genuinely unpaired. Check that image pairs are not placed directly next to each other, which would make the activity too easy.
8
Generate Answer Key and Export
Every worksheet created with the Find Objects generator includes an automatic answer key. Click the Answer Key tab to view it. In I Spy mode, the answer key highlights the locations of hidden objects within the scene. In Odd One Out mode, it marks the unpaired images. This saves you from manually creating answer overlays — the generator handles it automatically.
Before exporting, check the grayscale toggle. This checkbox converts your entire worksheet to grayscale for ink-saving printing. Grayscale worksheets are popular with schools and parents who print frequently and want to reduce ink costs. Consider creating both color and grayscale versions of each product — they appeal to different buyer segments and can be listed as separate products or bundled together.
The Name and Date fields checkbox adds name and date lines to the worksheet. Enable this for products targeting structured use.
Four export buttons are available:
Worksheet JPEG: High-resolution image file at 300 DPI print quality. Use for listing preview images, social media marketing, and digital download products.
Worksheet PDF: Professional print-ready format. This is the standard deliverable for printable product sales on all marketplaces.
Answer Key JPEG and Answer Key PDF: Separate exports for the answer key in both formats.
The free trial with watermark produces fully functional exports with a watermark overlay. This lets you evaluate print quality, test formatting, and create sample prints before purchasing a commercial license. The commercial license removes the watermark from all exports.
.webp)
.webp)


.webp)