Tutorial
1
Choose Your Question Type
The Big & Small Worksheet Maker offers five question types, each targeting a different size discrimination skill. Your question type selection determines the cognitive challenge and the target age group for your product.
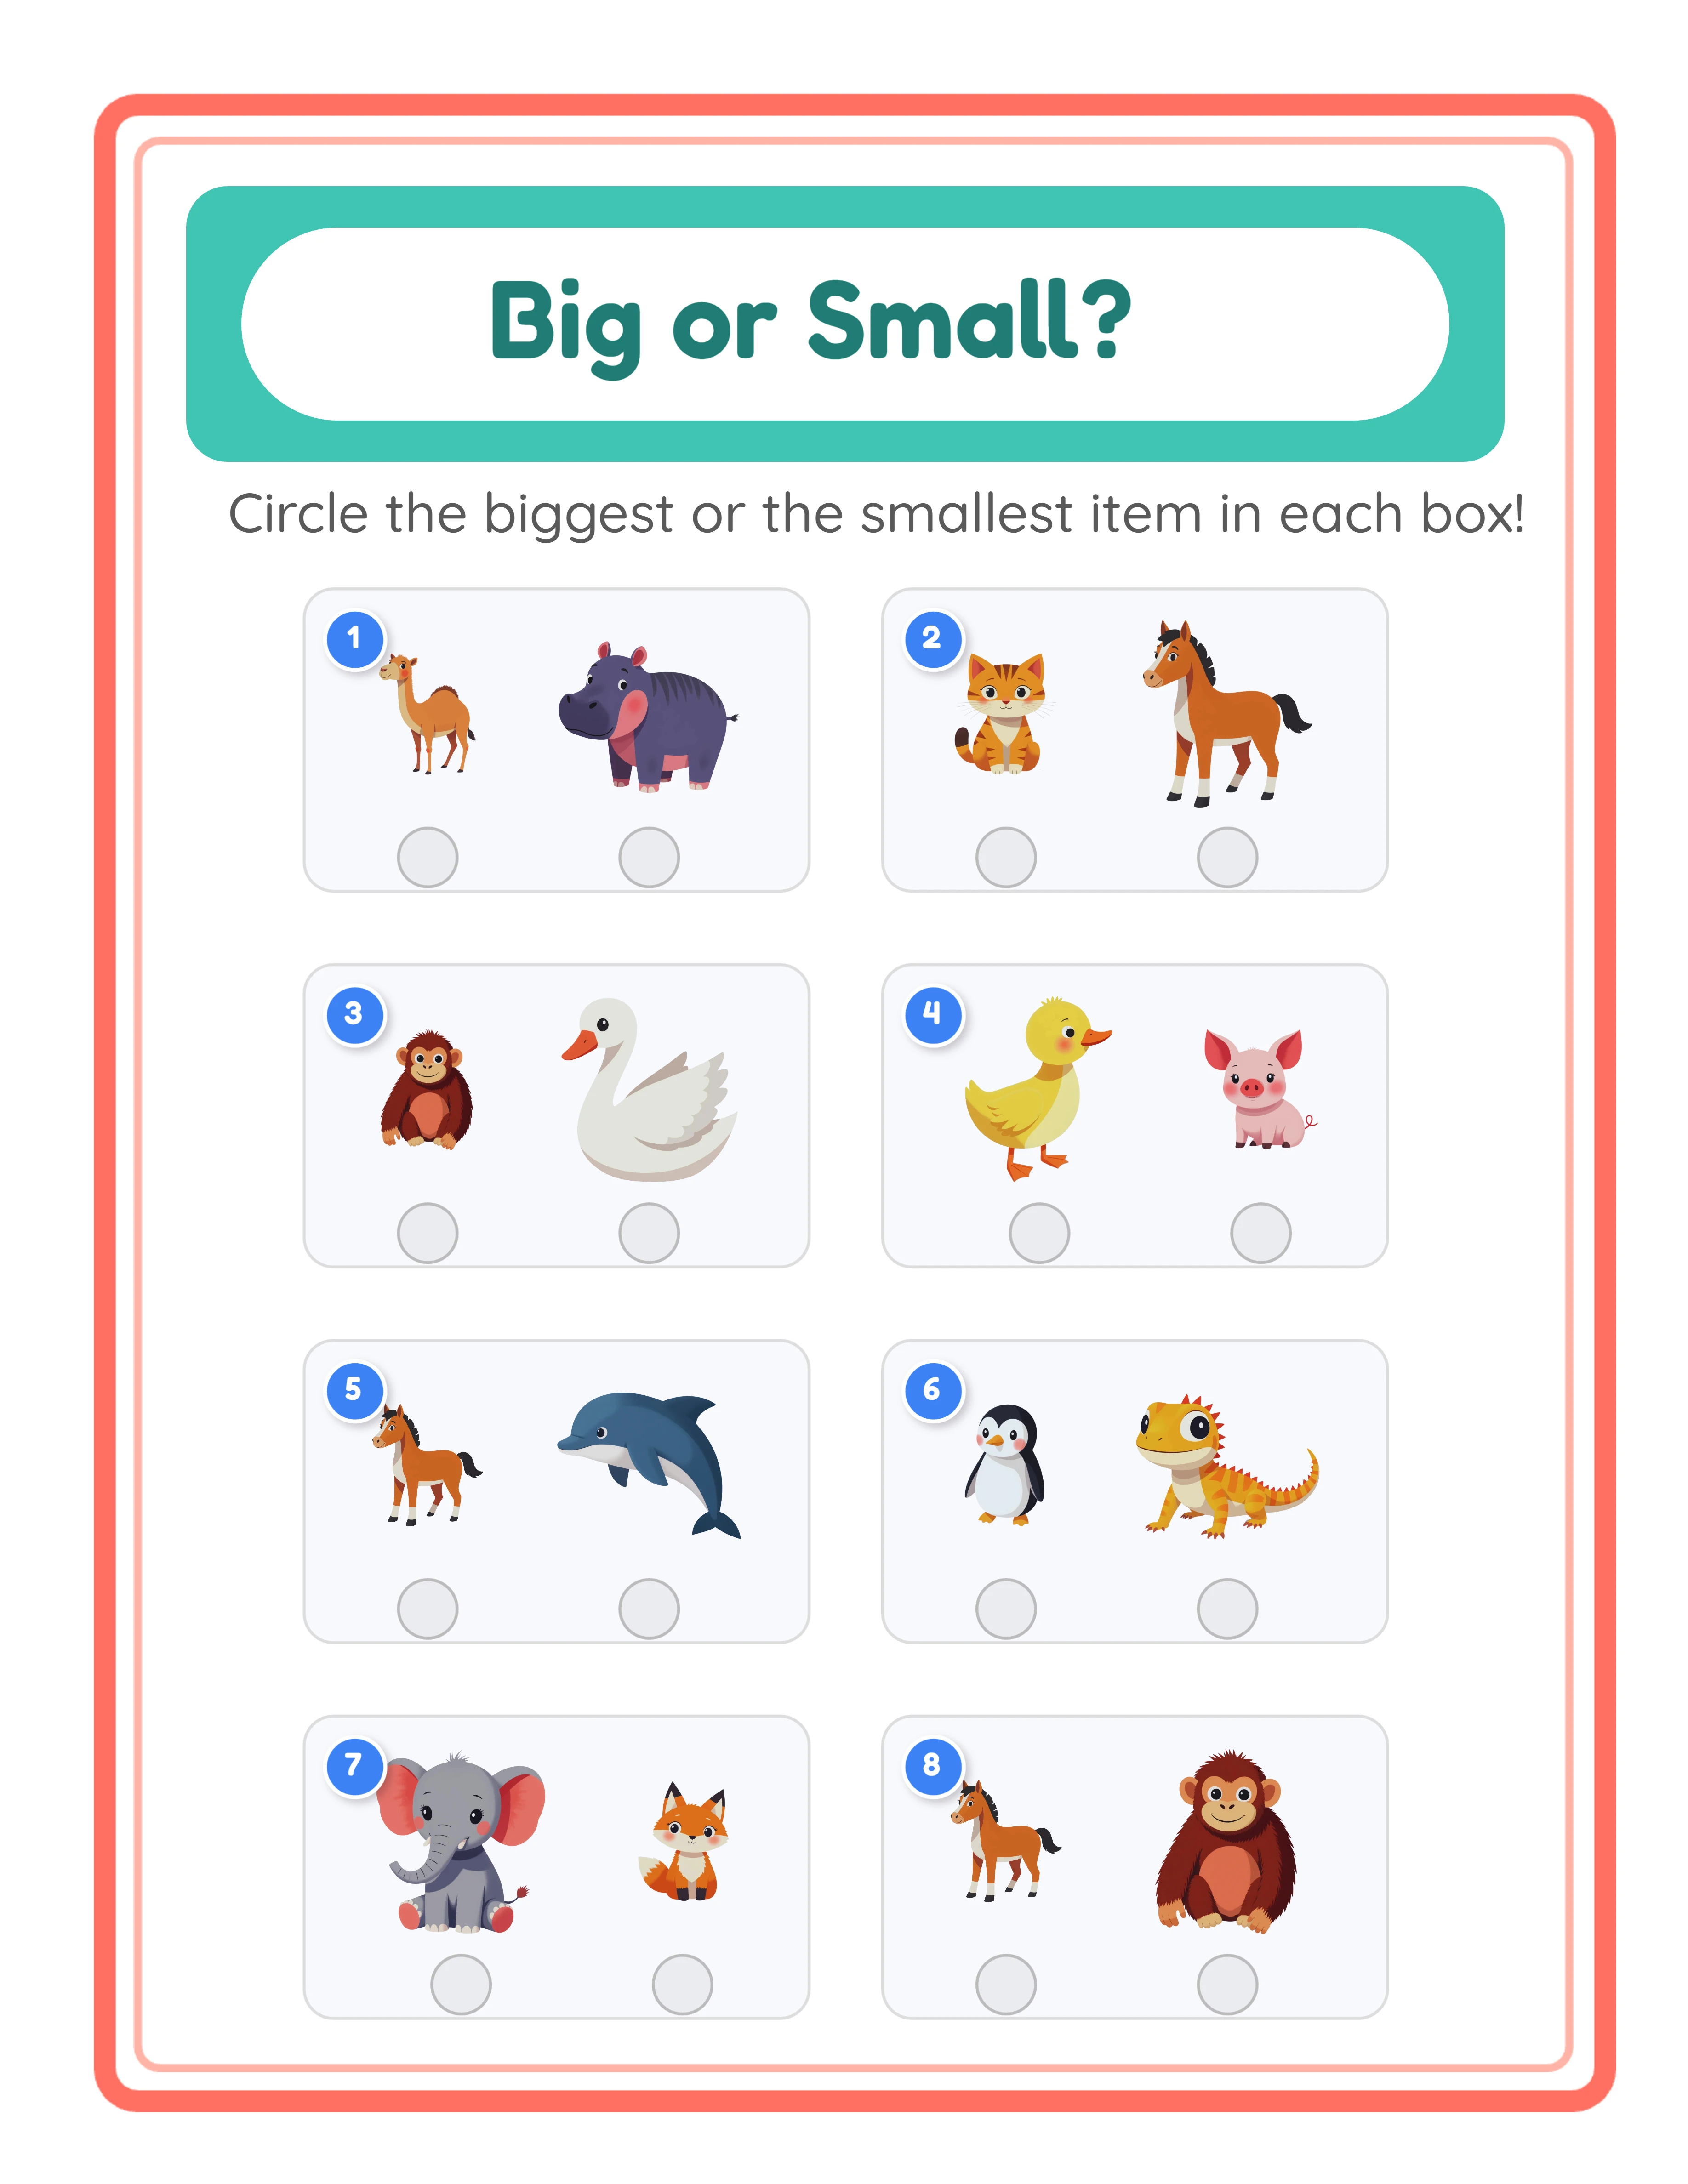
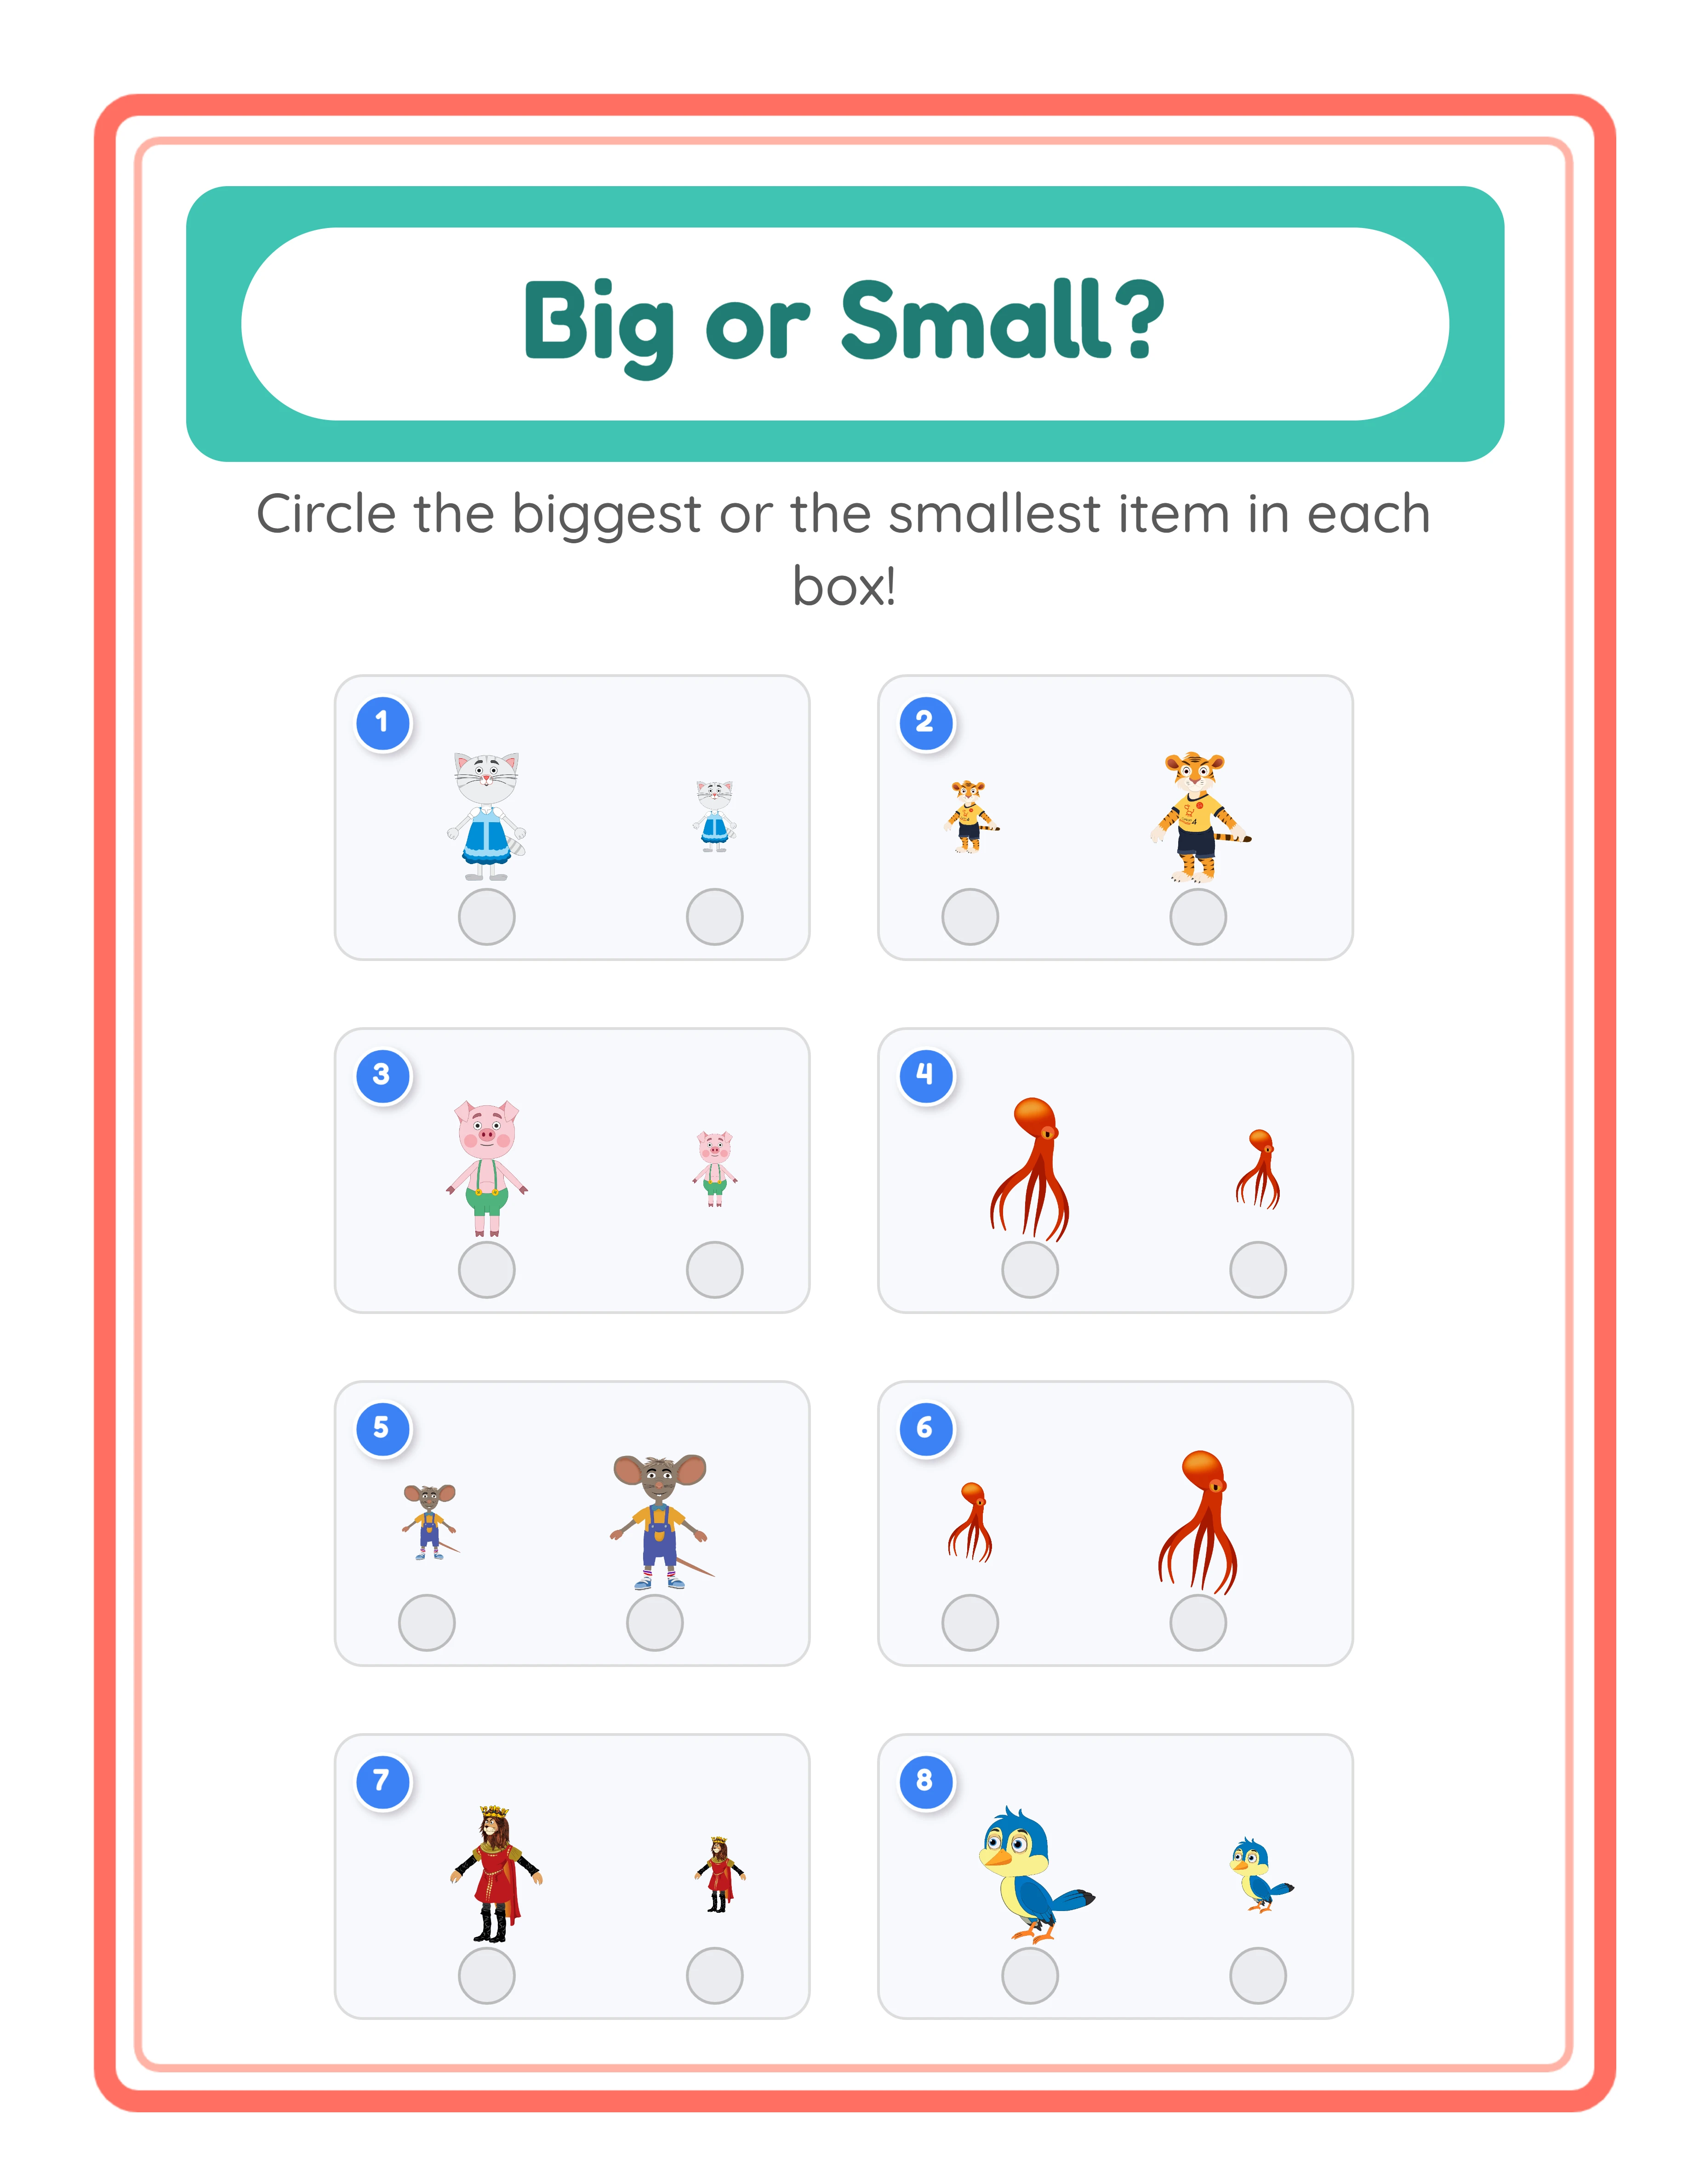
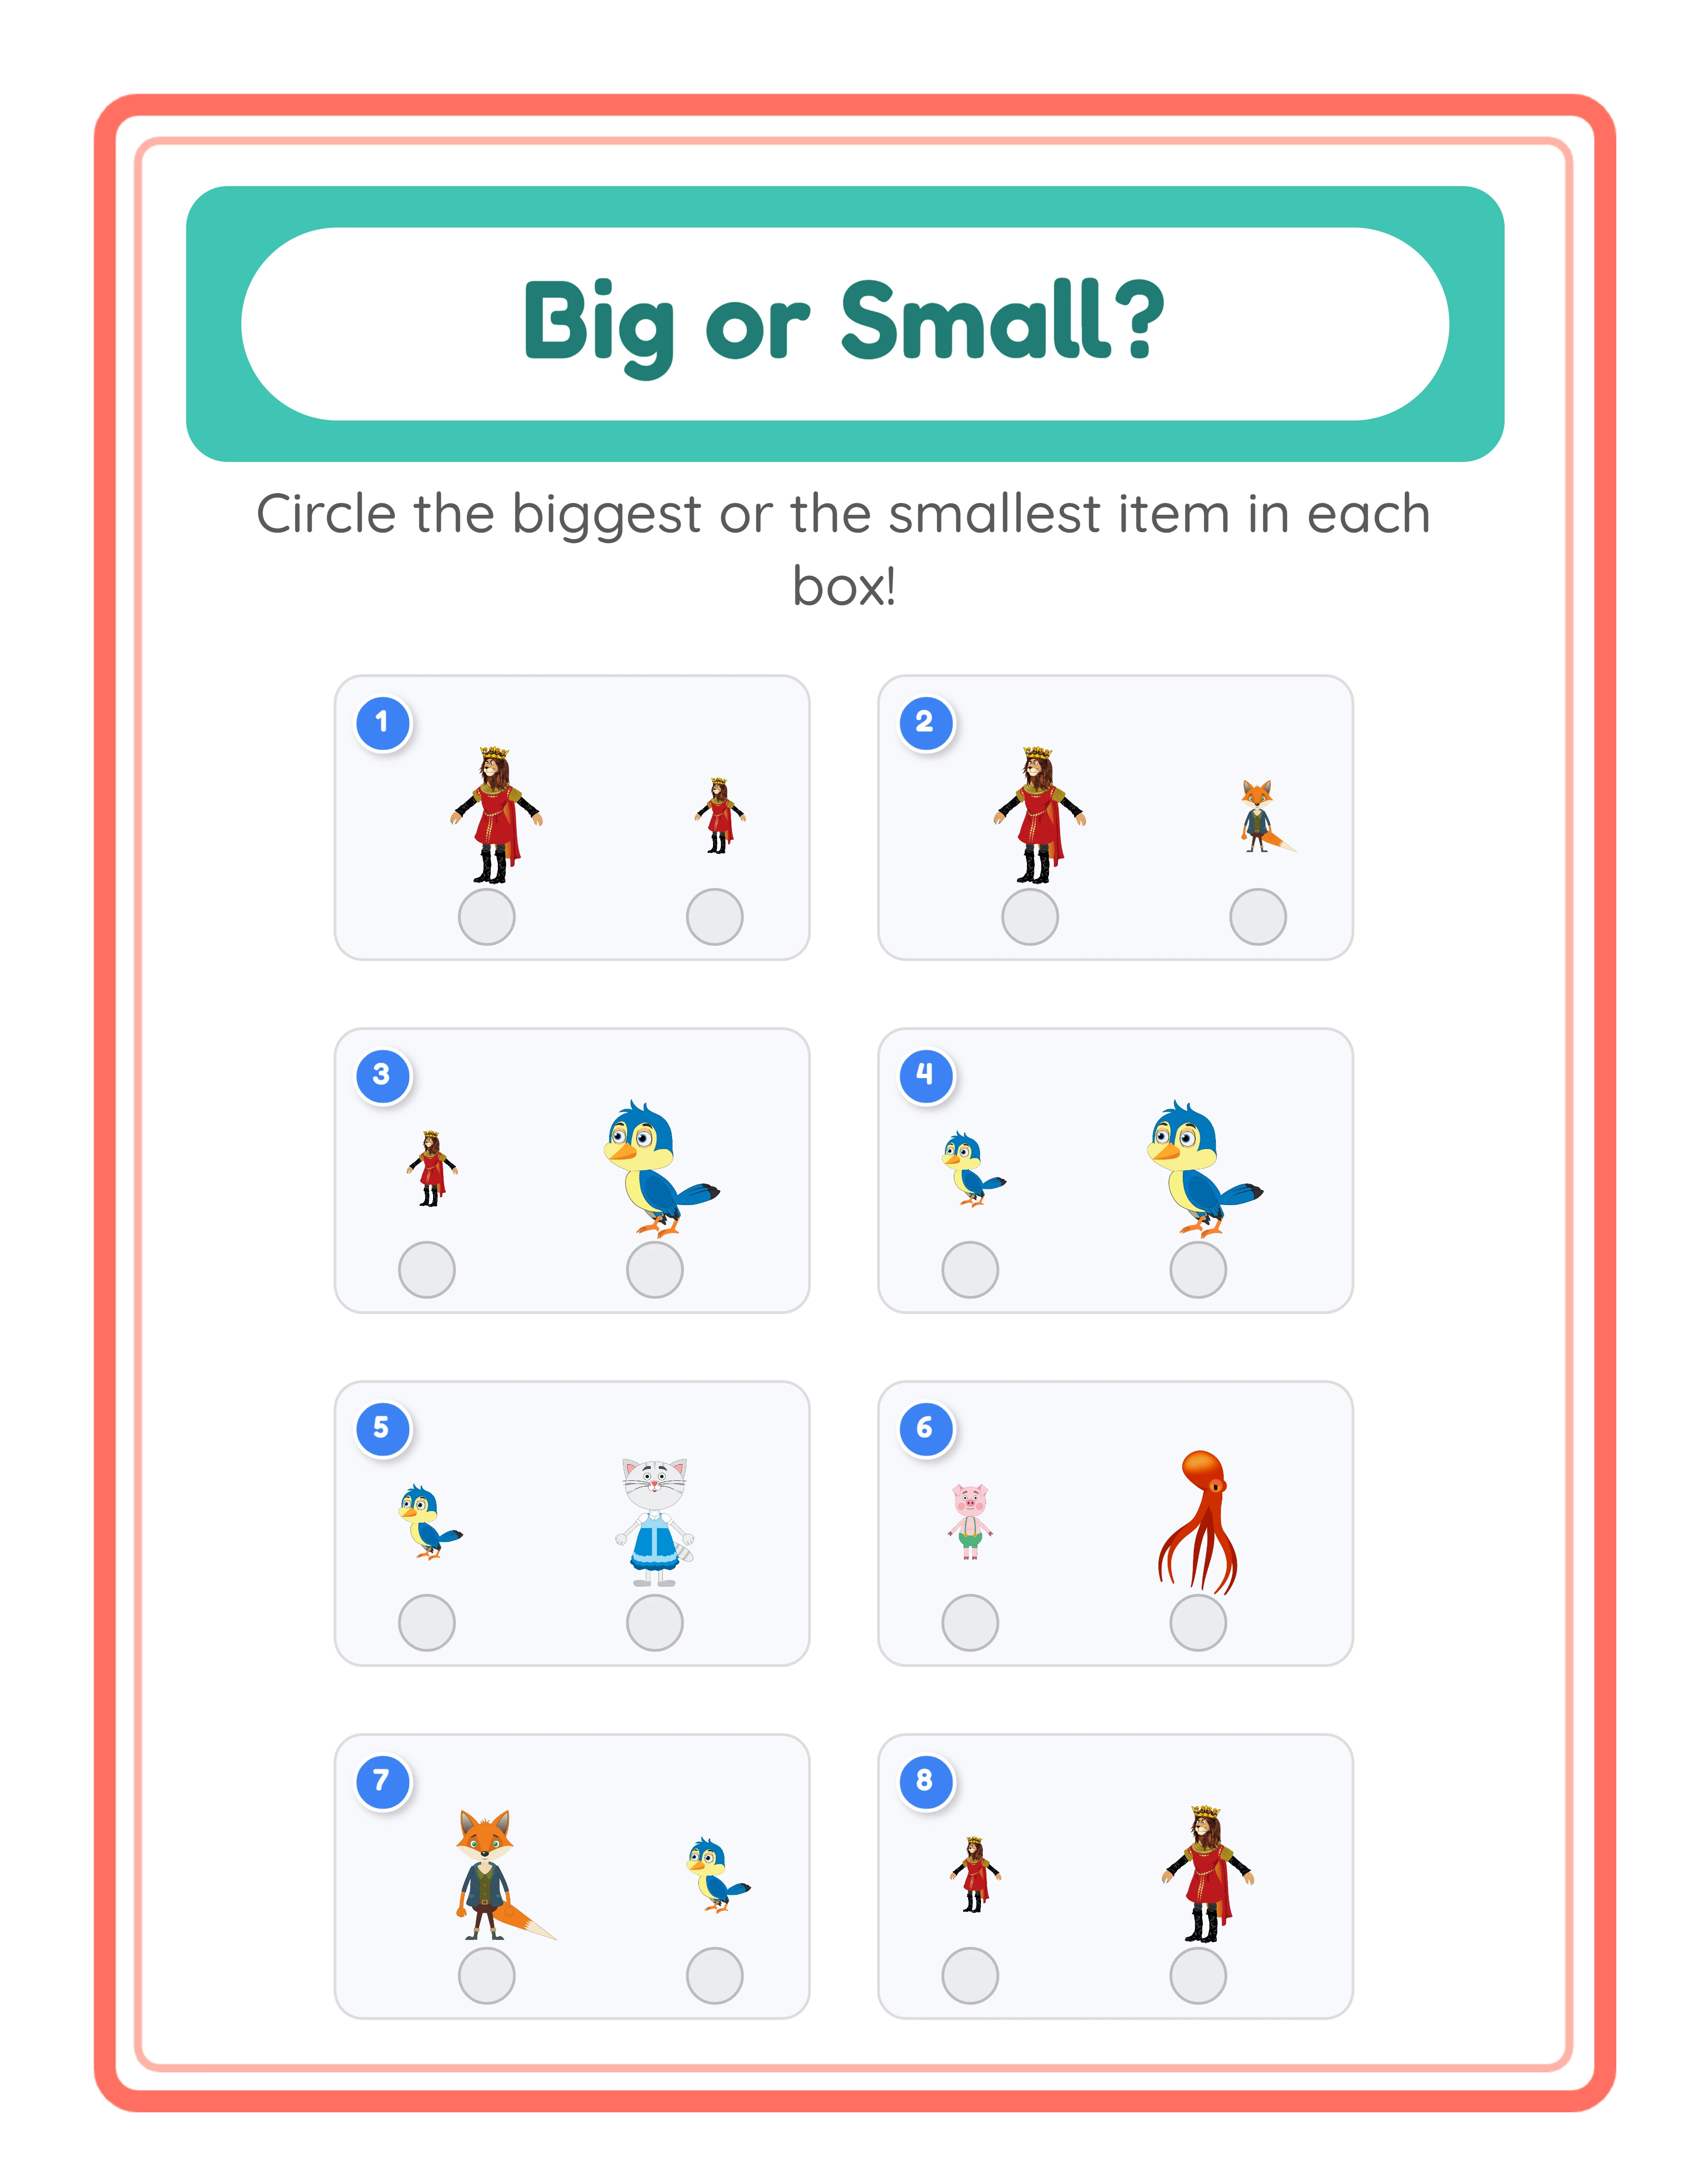
Circle the Big One is the simplest question type. Solvers look at two or three images displayed at different sizes and identify the largest one. This is ideal for toddlers and young the preschool-age market (ages 2–4) who are just beginning to distinguish size differences. The task is intuitive — even pre-verbal children can point to the bigger picture.
Circle the Small One reverses the task. Solvers identify the smallest image in the group. This is slightly harder than finding the biggest because "smallest" requires more careful comparison, especially when size differences are subtle. Target age: preschool (ages 3–5).
Circle the Medium One introduces a third size level. Solvers must identify the middle-sized image, which requires eliminating both the largest and smallest options. This question type requires 3 images per exercise and develops elimination reasoning. Target age: late preschool through kindergarten (ages 4–6).
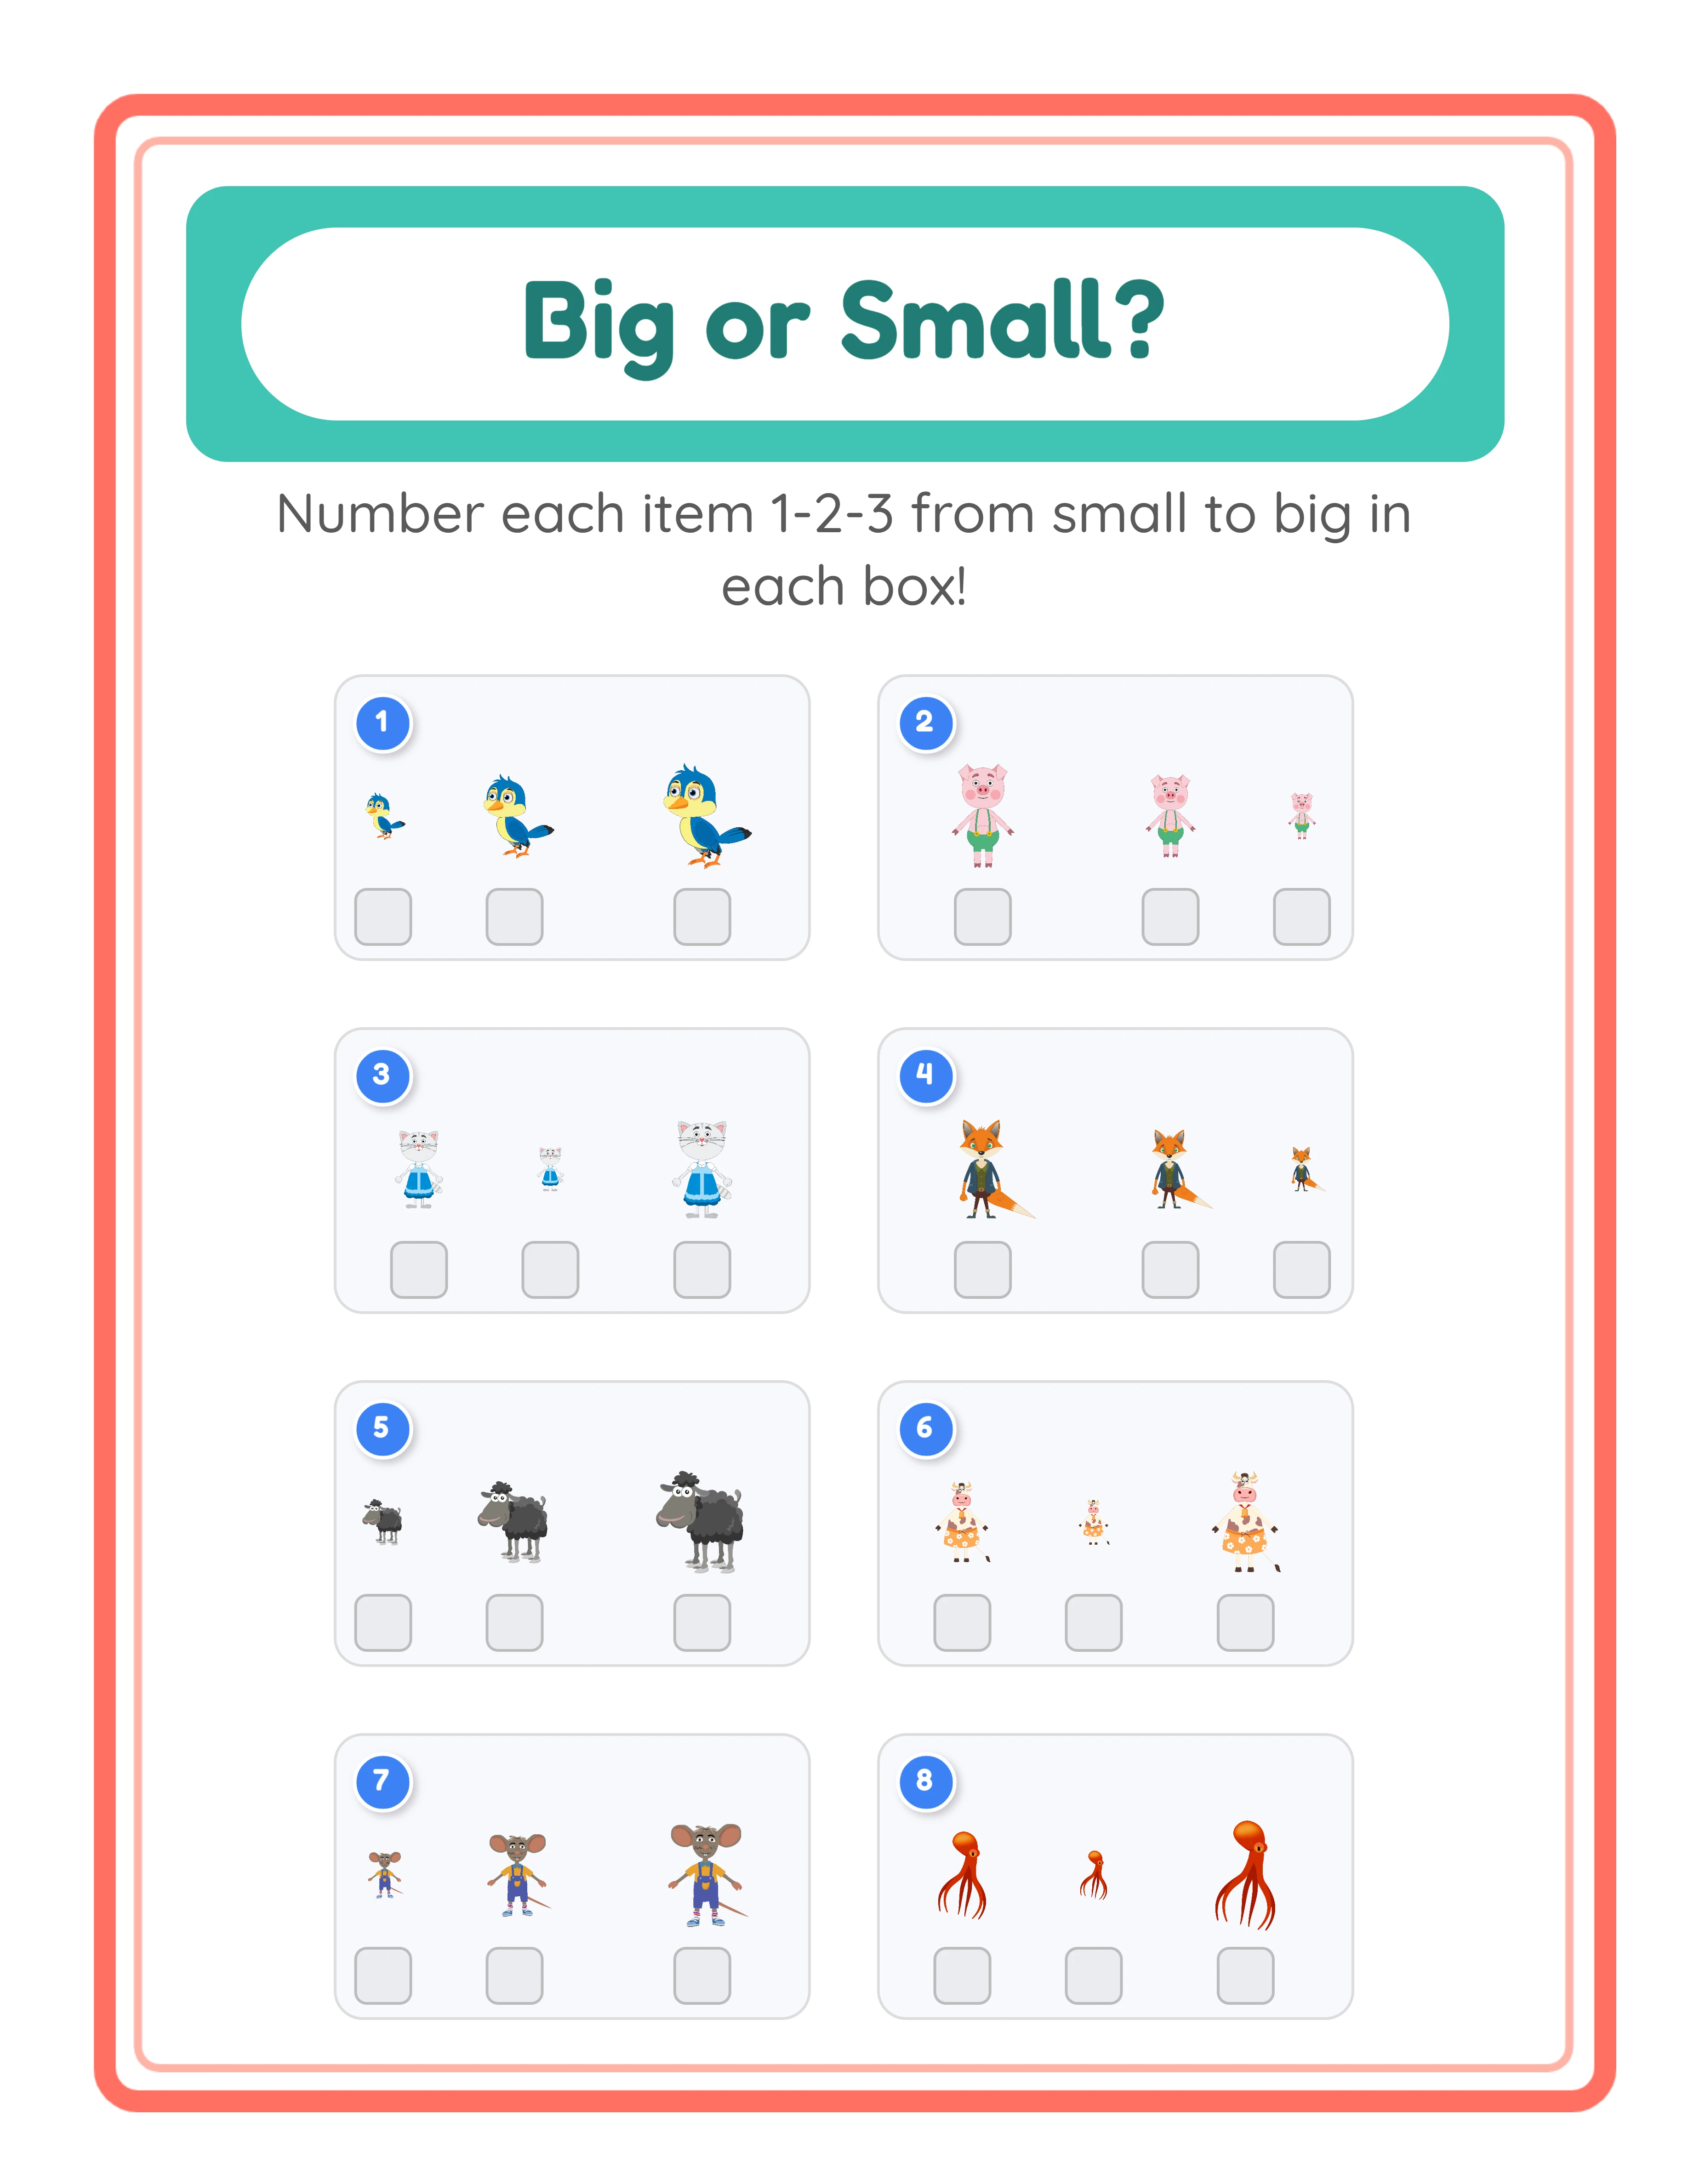
Number 1–2–3 Small to Big shifts from identification to sequencing. Solvers label each image in ascending size order. This requires comparing all items simultaneously and assigning ordinal positions — a multi-step cognitive task significantly harder than circling one answer. Target age: kindergarten through first grade (ages 5–7).
Number 1–2–3 Big to Small reverses the sequence to descending order. Solvers must order from largest to smallest. This variation prevents rote memorization of "always start with the smallest" and ensures genuine size reasoning.
In the generator, select your question type from the Content panel dropdown. For product creation, consider making separate products for each question type at the same theme — five question types multiplied by your theme count creates an extensive catalog from a single tool.
2
Select the Image Mode
The image mode setting fundamentally changes the nature of each exercise, creating two distinct product lines from the same tool.
Identical Images mode displays the same picture at different sizes. If you select a cat image, solvers see three copies of that exact cat — one small, one medium, one large. This mode isolates pure size perception because there are no confusing variables. The objects are identical in every way except size, so solvers focus entirely on comparing dimensions. This mode works best for younger learners (ages 2–4) and for introducing size concepts for the first time.
Different Images mode shows distinct objects at different sizes. Solvers might see a dog, a bird, and a fish — each displayed at a different scale. This mode requires relative size reasoning because solvers must compare unlike items. They cannot rely on recognizing "the same picture but bigger" and must instead evaluate actual dimensions. This mode works well for older the preschool-age market and the early-learner niche (ages 4–6) who have mastered basic size awareness and are ready for more complex visual reasoning.
The strategic value of two image modes is significant for product creators. Every theme you select can produce two completely different exercise sets — one in Identical mode and one in Different mode. A "Farm Animals" theme in Identical mode creates pure size perception exercises. The same theme in Different mode creates relative size reasoning exercises. Two genuinely different products from one theme selection with no additional creative work.
Switch between modes using the Image Mode toggle in the Content panel. The rest of your settings (question type, exercise count, theme, page layout) remain unchanged, so switching modes and regenerating takes seconds.
3
Configure Exercise Count and Images Per Exercise
Two settings control the density and complexity of each worksheet page: the number of exercises and the number of images per exercise.
Exercises per page ranges from 1 to 10. Fewer exercises create focused practice sheets with large, clear images — ideal for younger children and introductory worksheets. More exercises create denser assessment-style sheets suitable for older solvers and store testing.
For toddlers and young the preschool-age market (ages 2–4), use 2–3 exercises per page. The large image size makes size differences obvious and the reduced visual clutter helps maintain focus.
For the preschool-age market (ages 3–5), use 4–6 exercises per page. This balances clarity with enough practice to fill a meaningful activity session.
For the early-learner niche and first graders (ages 5–7), use 6–10 exercises per page. Denser layouts provide efficient practice and work well for homework sheets and timed assessments.
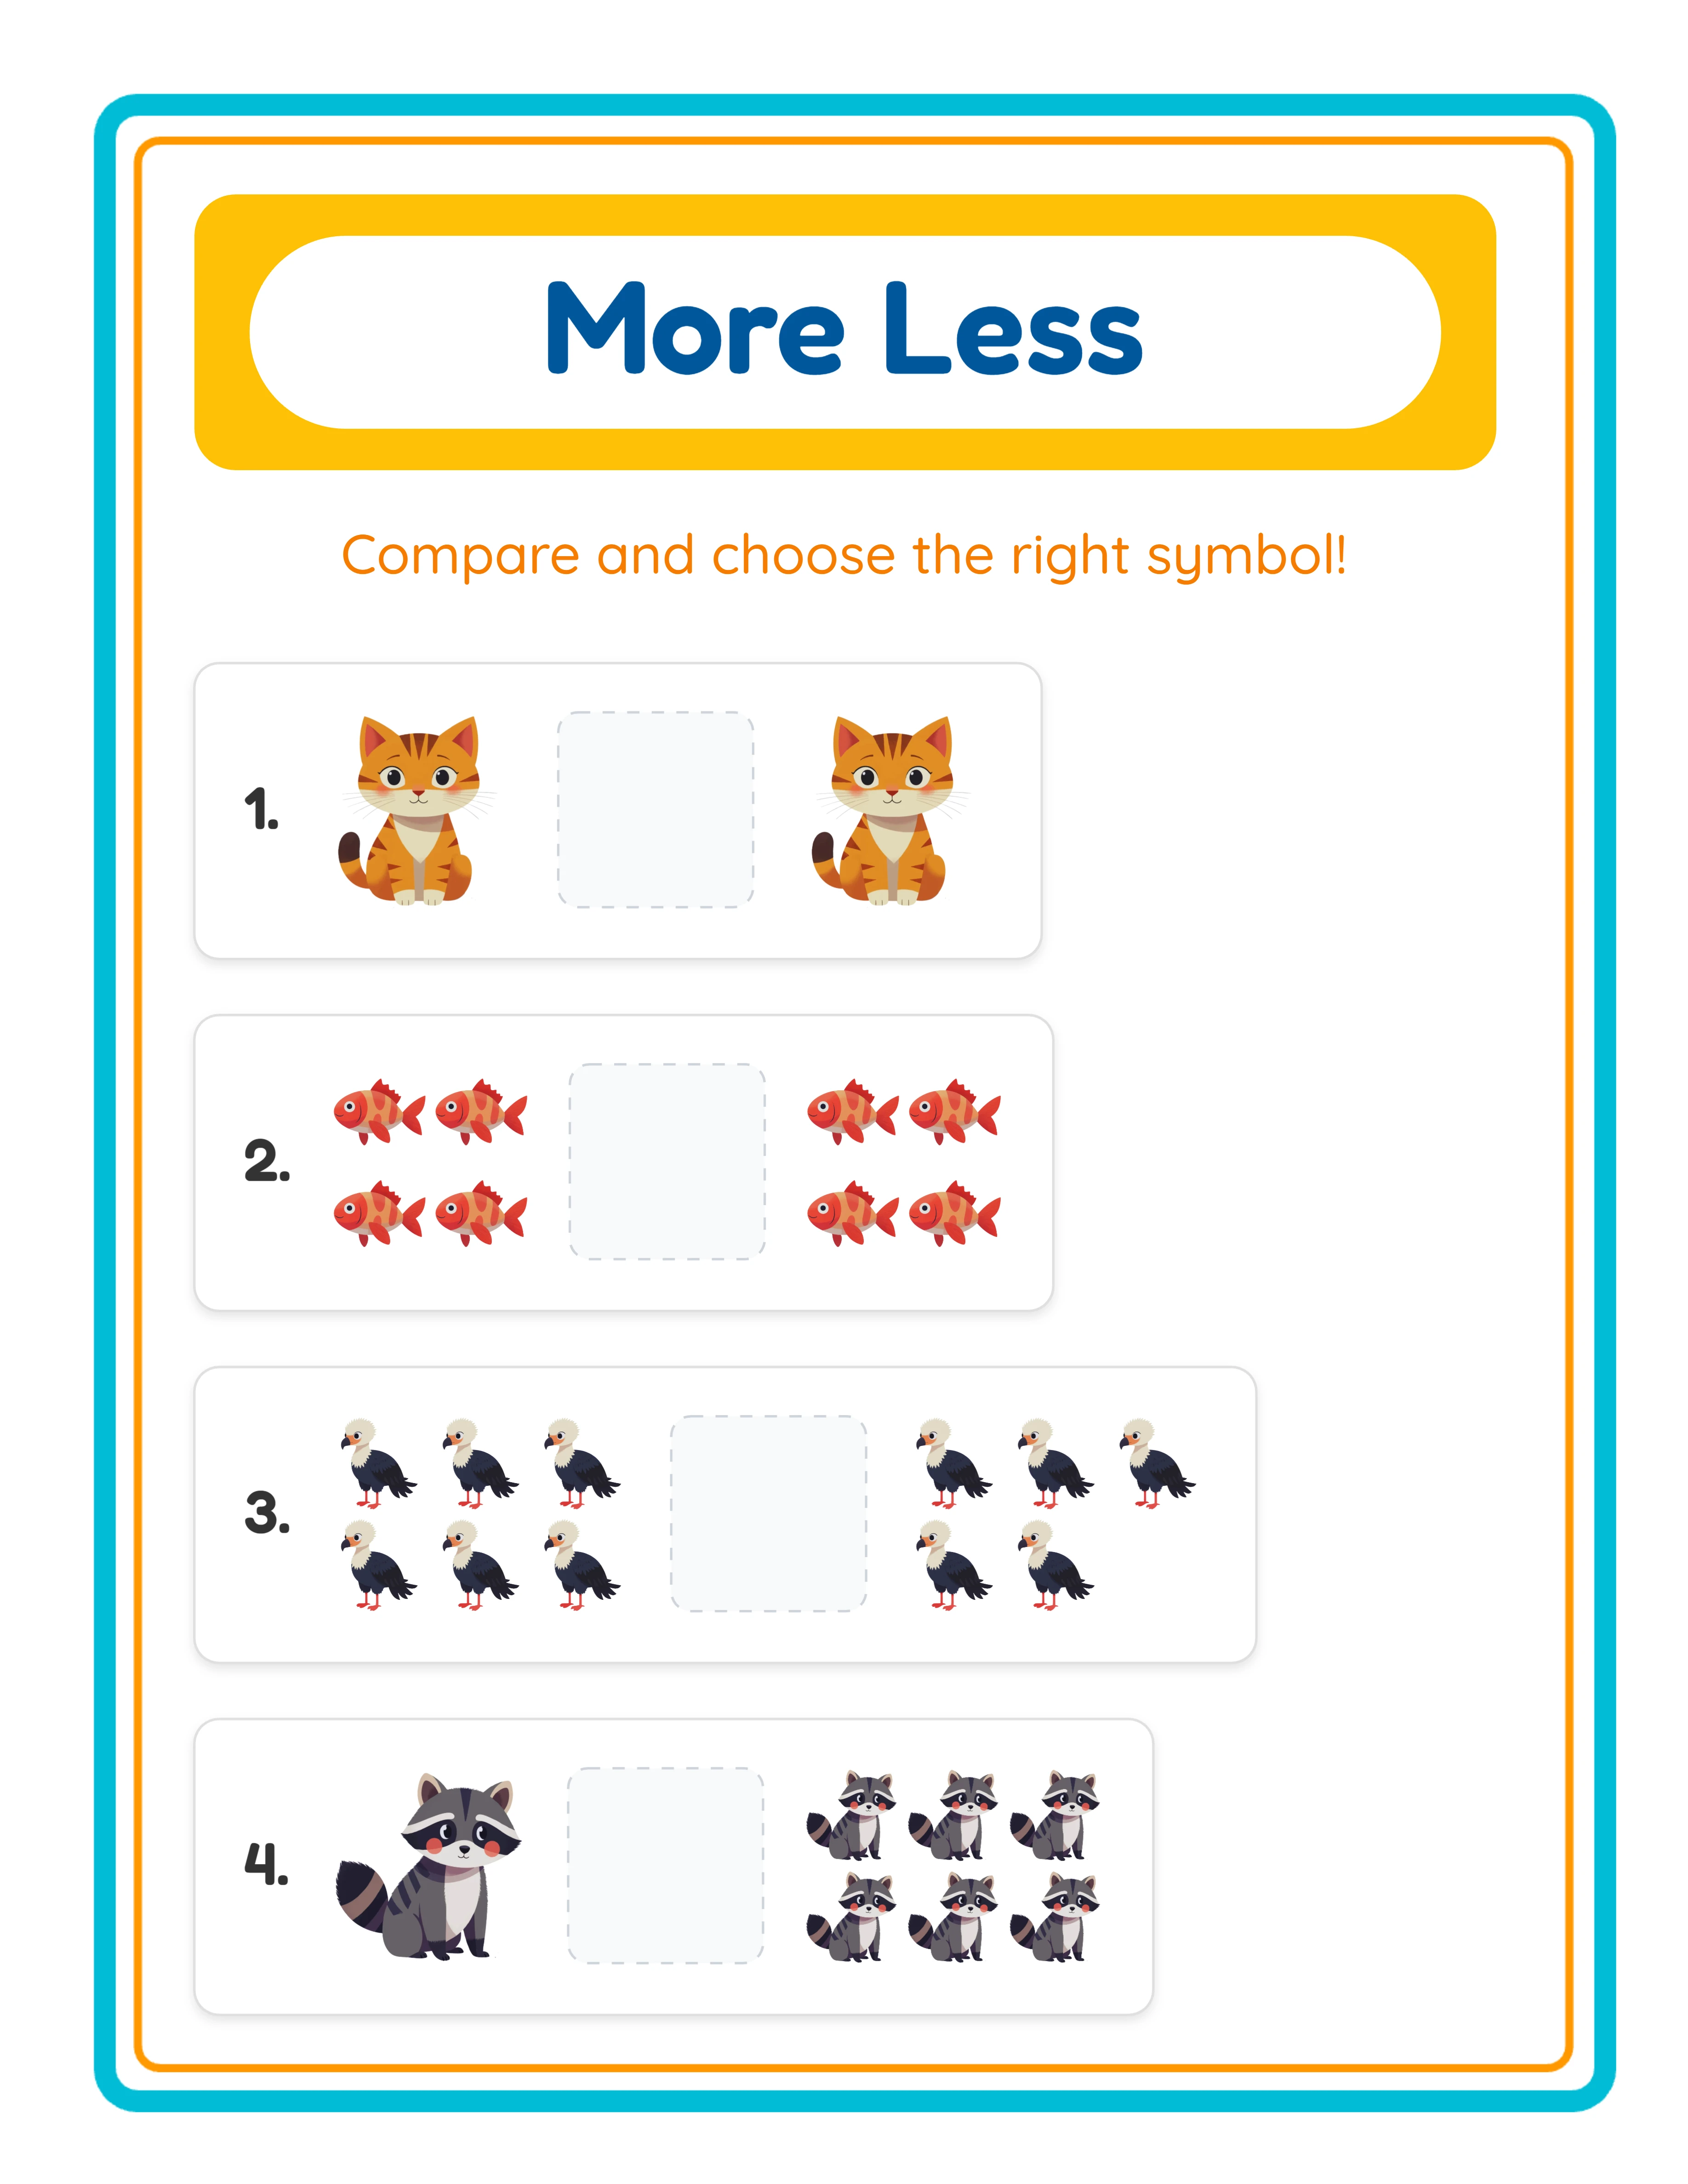
Images per exercise is set to either 2 or 3. Two images create straightforward bigger/smaller comparisons — solvers choose between two options. Three images introduce the medium size level, enable the Circle the Medium question type, and make numbering exercises harder with three items to order instead of two.
Start with 2 images for the simplest products targeting younger learners. Progress to 3 images for products aimed at children ready for more complex comparisons. Creating both 2-image and 3-image versions of the same theme gives you additional product variations.
4
Browse Themes or Upload Custom Images
The image library contains 104 themed collections with over 3,100 illustrations spanning animals, food, vehicles, nature, holidays, professions, sports, and dozens more categories. Each theme provides a coordinated set of images that work together visually in size comparison exercises.
Theme selection is a strategic product decision. Each theme creates a unique product with distinct search keywords on marketplaces. "Farm Animals Size Comparison Worksheets" and "Ocean Creatures Size Comparison Worksheets" target completely different buyer searches despite using the same generator settings. With 104 themes available, you can build an extensive product catalog without repeating yourself.
Browse themes using the theme dropdown in the Image Library panel. Select a theme to see all available images. The generator uses these images to populate your exercises according to your question type and image mode settings.
You can also upload your own custom images for subject-specific worksheets. Click the upload area to add image files from your computer. Custom uploads are session-based, meaning they persist while your browser tab is open. Upload custom images when you want to target niche topics the built-in library does not cover — comparing building sizes for architecture lessons, food portion sizes for health education, or planet sizes for science units.
Additional layout toggles in the Content panel let you show or hide exercise numbers and answer indicator boxes. Exercise numbers label each problem (1, 2, 3...) for easy reference. Answer indicator boxes provide visual frames that guide solvers to circle or number their answers.
5
Set Page Size and Background
Page configuration determines the physical dimensions and visual styling of your finished worksheet.
Page size options include US Letter Portrait, US Letter Landscape, A4 Portrait, A4 Landscape, Square (1200×1200), and Custom dimensions. US Letter is standard for North American buyers. A4 is standard for European and international markets. Square format works well for social media posts and certain Amazon KDP interior formats. Creating both US Letter and A4 versions of every worksheet doubles your international market reach with minimal effort.
The background section provides controls for visual polish:
Page color sets the base background color. White is standard for printed worksheets. Light pastels can add warmth to digital-use products without interfering with image visibility.
Background theme lets you select a decorative pattern from the image library. This fills the page behind your exercises, adding visual texture and a professional look. Background opacity controls how prominently the pattern appears — lower values (0.1–0.3) create subtle watermark effects while higher values (0.5–0.8) make the background a visible design element.
Border theme adds decorative frames around the entire page. Like background themes, borders come with independent opacity controls. A themed border with matching background creates a cohesive, professionally designed look that distinguishes your products from plain worksheets.
These visual styling options are important for marketplace competitiveness. Buyers browsing Etsy or Gumroad compare dozens of similar products, and worksheets with polished backgrounds and coordinated borders consistently attract more clicks and sales than plain white pages.
6
Add Text and Customize Layout
The Text Tools panel lets you add titles, instructions, name and date fields, and custom labels to your worksheet. While the exercises themselves are zero-text (images only), you can add text elements around them for structure and branding.
Common text additions include worksheet titles ("Size Comparison Practice" or "Circle the Big One"), name and date fields for practical use, and custom instructions describing the task. The name and date fields checkbox adds formatted lines at the top of the worksheet — buyers strongly prefer worksheets with these fields.
Font selection offers five families: Baloo 2, Fredoka, Lexend Deca, Nunito, and Quicksand. Fredoka and Baloo 2 are playful and engaging, ideal for preschool and kindergarten products. Lexend Deca and Nunito are clean and modern, suitable for products targeting older children or practical use.
Text outline adds a colored border around each letter, improving readability when text sits near busy areas of the worksheet. Set an outline color that contrasts with both the text color and the background. Outline width ranges from subtle (1–2) to bold (3–4).
The full Fabric.js canvas gives you complete control over element positioning. Drag, resize, rotate, and reposition every element. Alignment tools snap elements into precise positions. Lock controls protect finished elements while you continue editing others. Unlimited undo and redo let you experiment freely without risk.
Remember: the text you add is supplementary — the core exercises remain fully visual with no text on the generated exercise areas. Any instructional text you add is optional and positioned outside the exercise grid.
7
Generate and Review the Worksheet
With your settings configured, click the Generate button to create your worksheet. The generator places images according to your question type, image mode, exercise count, and images-per-exercise settings onto the canvas.
Review the preview carefully before exporting:
Check size differences: Are the size variations between images clear and unambiguous? For Circle the Big One, is the largest image obviously bigger? For Circle the Medium, is the middle size clearly distinguishable from both the largest and smallest? If size differences are too subtle, solvers may struggle or give incorrect answers.
Check difficulty alignment: Does the cognitive challenge match your target age group? A preschool worksheet should have obvious size differences with 2 images. A kindergarten worksheet can have subtler differences with 3 images. Verify by asking yourself whether a child of the target age could complete the exercise with focused effort but without frustration.
Check layout density: Are exercises spaced clearly with enough room for solvers to circle or number their answers? Are images large enough to see details clearly? If the page feels cramped, reduce the exercise count per page.
Check image mode consistency: If you selected Identical Images, verify that each exercise shows the same picture at different sizes. If you selected Different Images, verify that distinct objects appear at clearly different scales.
If anything looks off, adjust your settings and regenerate. The canvas updates instantly, so you can iterate quickly through different configurations until you find the layout that looks best for your product.
8
Generate Answer Key and Export
Every worksheet created with the Big & Small Worksheet Maker includes an automatic answer key. Click Generate Answer Key to create a solved version where correct answers are highlighted and circled for instant visual verification. For circle-type questions, the answer key marks the correct image. For numbering questions, it displays the correct size order. This eliminates the need to create answer overlays manually.
Before exporting, consider the grayscale toggle. This checkbox converts your entire worksheet to black and white. Grayscale worksheets cost significantly less to print and meet Amazon KDP interior requirements for standard (non-premium color) books. Consider creating both color and grayscale versions of each product — they serve different buyer needs and can be listed separately or bundled together.
The Name and Date fields checkbox adds name and date lines to the worksheet. Always enable this for products targeting practical use.
Four export buttons are available:
Worksheet JPEG: High-resolution image file at 300 DPI. Use for listing preview images, social media marketing, and digital download products.
Worksheet PDF: Professional print-ready format. PDF is the standard deliverable for printable product sales on all marketplaces.
Answer Key JPEG and Answer Key PDF: Separate exports for the answer key in both formats.
The free trial with watermark produces fully functional exports with a watermark overlay. This lets you evaluate print quality, verify formatting, and create test prints before purchasing a commercial license. The commercial license removes the watermark from all exports, producing clean files ready for sale.
Always export both the worksheet and answer key. On every marketplace, "with answer key" is a commonly searched qualifier that improves your listing visibility and perceived value.
.webp)
.webp)


.webp)
.webp)
